100 Days Project, Dairy Free, Gluten Free, Party Food, Recipes, Side Dish, Snacks, Vegan

Day 37 – Dolmades

Day37

Since I started off last night with my Day 36 Feta & Pesto Stuffed Peppadew Peppers post, I decided to keep up the theme for the weekend with recipes for small plate tapas type dishes. Dolmades seemed like the perfect fit!!

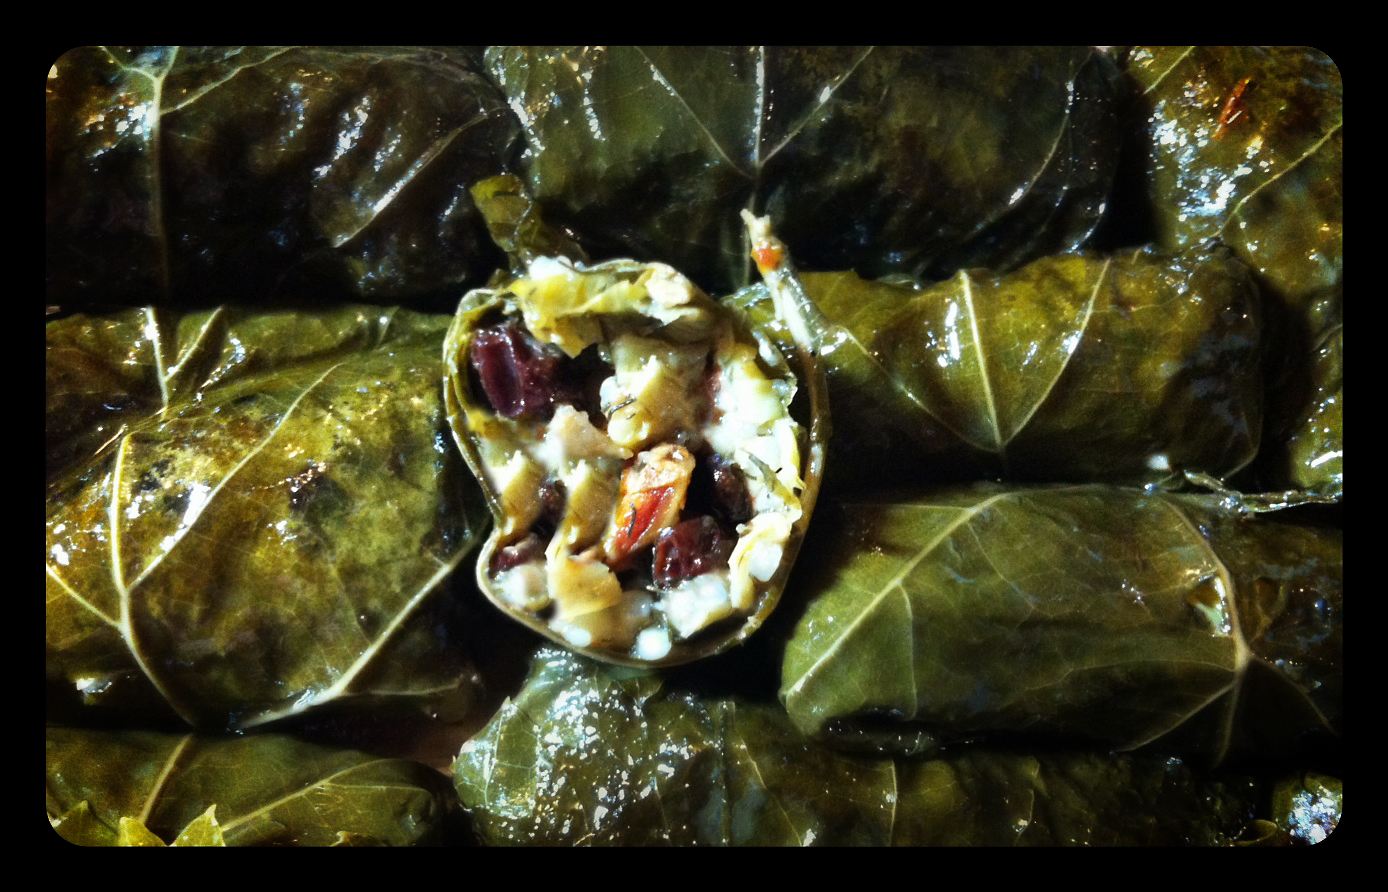
Dolmades or Dolma are a stuffed vegetable dish common in the Balkans and surrounding regions of the Middle East. The word Dolma comes from the Turkish for “stuffed thing”. Generally, grape or cabbage leaves are wrapped around a rice based filling, that can be meat or vegetarian, and includes onion, herbs like dill, mint or parsley and spices. While meat Dolma are served warm, vegetarian ones are often served cold or at room temperature. There are numerous variations of ingredients and fillings across the many countries that make a Dolma-like dish.

I first made and had Dolmades as a pre-teen at summer camp. Two kids from every cabin had to help out the kitchen staff with food prep every day. Probably not hard to believe that this was one of my favorite tasks on the chore rotation. I remember one day when we came in, there was a big industrial sized bowl of rice filling and all these grape leaves. I had never thought about eating an actual leaf before (not including lettuce) and thought this was a bit strange. I followed instructions on how to fill and roll the grape leaves into Dolmades, and was pleasantly surprised when it came to dinner time that this strange dish was actually quite yummy!! Although I have eaten Dolmades many times since then, this was probably the last time I tried making them myself until today.

Dolmades

adpated from: Kitchen Classics – Gourmet Vegetarian

MAKES: approx. 40 Dolma

INGREDIENTS

  • 6 spring onion (green onions)
  • 1/2 cup olive oil
  • 3/4 cup long grain rice
  • 15 grams or 1/2 ounce fresh mint
  • 2 tablespoons chopped dill
  • 2/3 cup lemon juice
  • salt and pepper, to taste
  • 1/4 cup currants
  • 1/4 cup sun-dried tomatoes, finely chopped
  • 1/4 cup artichoke hearts, finely chopped
  • 1/4 cup pine nuts, toasted.
  • 235 grams or 8 1/2 ounce packaged pickled grape leaves
  • 2 tablespoons olive oil, extra

Heat the oil in a medium sized sauce pan. Chop the spring onions and add them to the pan, cooking them over a medium heat for only one minute.  Stir in the rice, mint, dill, half the lemon juice, and salt and pepper to taste. Add 1 cup of water and bring to a boil, then reduce heat, cover, and simmer for 20 minutes.

Dry roast the pine nuts until they are toasted and golden brown.

Remove the lid, and fork through the currants, sun-dried tomatoes, artichokes, and toasted pine nuts. Cover with a paper towel, then the lid, and leave to one side to cool.

Gently rinse and separate the grape leave, then pat dry with a paper towel and trim any thick stems off with scissors.

Line the base of a 20cm or 8 inch pot with any torn of misshapen leaves. Choose the larger leaves for filling and sue the smaller ones to patch any gaps.

Place a leaf shiny side down, vein side up,  on a cutting board. Spoon a tablespoon of filling into the center of the leaf.  Bring in the sides, and roll up tightly from the stem end of the leaf. Place seam side down in the base of the leaf lined pot arranging them close together in a single layer.

Pour int he rest of the lemon juice, the extra oil , and enough water to just cover the top of the dolmades. Cover them with an inverted plate and some sort of weight to firmly compress the dolmades and keep them in place while cooking (I had trouble finding something for this, but a tin of canned vegetables might work). Cover with the lid, and bring the liquid up to a boil reducing it to a simmer for 45 minutes. Let them cool and serve at room temperature.

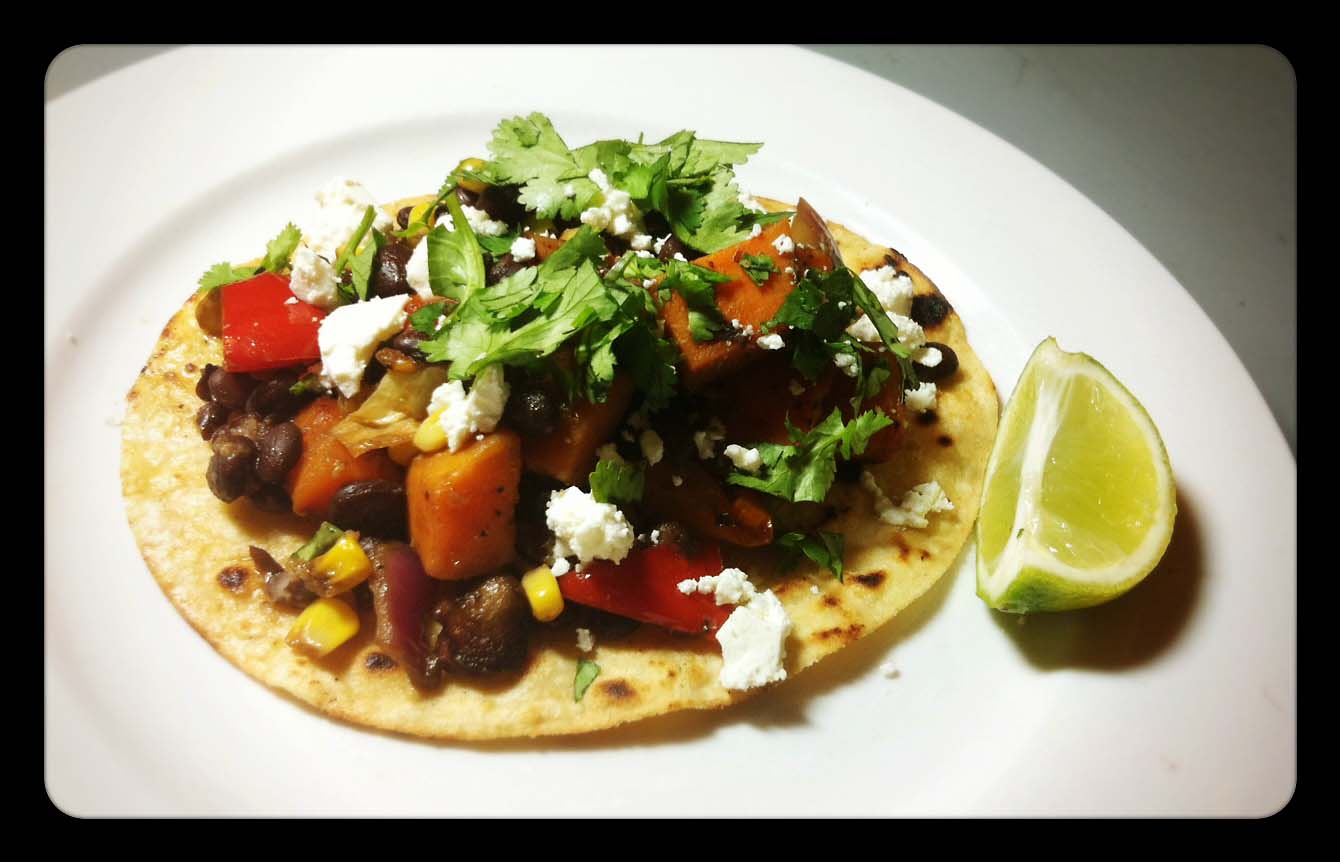
These would make a great side dish to go with my Lebanese Red Lentil Soup.

ENJOY!!

Advertisement
Standard
Dairy Free, Gluten Free, Recipes, Soups, Vegan

Lebanese Red Lentil Soup

RedLentilSoup

This soup is one of my favorite easy recipes to make, and is great for a winter weekday, when you just want something simple, warm, and full of flavor.

The recipe, originally from the Allrecipes.com website posted by JENP1, is closest I have been able to come to my favorite red lentil soup served at Mezze Bar in Auckland CBD.  It was not originally a vegetarian recipe, but with the substitution of vegetable stock for chicken stock, and a few small tweaks of the spices, I do not think it has lost any of its flavor.

Red lentils, which are very high in protein, vitamins, and nutrients, are often used in Middle Eastern style cooking. Lentils were one of the first domesticated crops, but may have been eaten by humans almost 13,000 years ago. Red lentils contain a lower concentration of fiber than green lentils, but that means they cook up quicker and you do not need to soak them overnight.

This recipe originally calls for fresh coriander, which is typical in a Middle Eastern dish, but I forgot to buy this ingredient at the store, so substituted with fresh chives. It still tasted nice, but would recommend going with the coriander for authenticity, if you have the option.

Lebanese Red Lentil Soup

adapted from: JENP1, Allrecipes.com

SERVES: 6-8

INGREDIENTS

  • 6 cups vegetable stock
  • 450 grams or 1 pound  red lentils
  • 3 tablespoons olive oil
  • 1 tablespoon minced garlic
  • 1 large onion, chopped
  • 2 tablespoons ground cumin
  • 1 tablespoon of ground coriander
  • 1 tablespoon of black pepper
  • 1/2 cup chopped coriander
  • 3/4 cup fresh lemon juice

Bring vegetable stock and lentils to a boil in a large soup pot over high heat, then reduce heat to medium-low, cover, and simmer for 20 minutes.

Meanwhile, heat olive oil in a skillet over medium heat. Stir in garlic, onion, and spices and cook until the onion has softened and turned translucent, about 3 minutes.

Stir onions into the lentils, and continue simmering until the lentils are tender, about 10 minutes.

At this point if you are in a hurry, you can puree the soup in a standing blender or with a stick blender to get a smooth consistency, but I prefer to turn down the heat to low and let it continue to simmer for another 10-15 minutes, and the lentils will break down themselves.

Stir in the fresh coriander and lemon juice before serving, and garnish with feta cheese and a bit more coriander. Leave off the cheese if you want to keep this soup Vegan.

ENJOY!!

Standard
100 Days Project, Dairy Free, Gluten Free, Recipes, Soups, Vegan

Day 30 – Carrot, Ginger, & Miso Soup

day30

Carrots again !?! You might ask . . .

Yes, carrots again . . . this is what happens when you buy a big bag of any ingredient. Obviously, things are less expensive when you buy them in bulk, and if you want to be sustainable in your cooking, then it does not pay to let the extras go to waste. Soups are a great way to use up large amounts of vegetables that need cooking.

This recipe for Carrot, Ginger & Miso Soup, from Dish magazine, combines the carrots with traditionally Japanese flavors. Miso is a Japanese seasoning produced by fermenting rice, barley, soybeans, salt and a particular fungus called kōjikin. The result is a thick paste, that is high is protein and rich in vitamins and minerals, used for sauces, spreads, pickling vegetables or meats, and mixing with soup stock. Miso played an important nutritional role in feudal Japan, and is still widely used, both in traditional and modern Japanese cooking. Typically, miso is salty, but its flavor and aroma depend on various factors in the ingredients and fermentation process. There is a wide variety of miso available, and different varieties of miso can be described as salty, sweet, earthy, fruity, and savory. I tend to always keep Miso in the fridge, as miso soup makes a great quick meal, and it can be used to add flavor and protein into many dishes, both in Japanese cuisine and more western modern vegetarian cooking.

Just a quick tip . . . if you have left over fresh ginger, pop it into the freezer. Once frozen it will last for months, and when used in cooking the frozen ginger thaws and has the same robust flavor as when it was fresh. This trick can also be used for saving chilli peppers.

Carrot, Ginger & Miso Soup

adapted from: Dish Magazine

SERVES: 4-6

INGREDIENTS

  • 1 tablespoon olive oil
  • 1 onion, chopped
  • 4 cloves of garlic, crushed
  • 5 cm or 1 in piece of fresh ginger
  • 1 kg or 2.2 lbs carrots, peeled and chopped
  • 1/4 cup white miso paste
  • 1 litre vegetable stock
  • sea salt and crushed black pepper to taste
  • toasted sesame seeds, spring onions, and sesame oil for garnish

Heat the oil in a large sauce pan over a high heat.

Add the onion, garlic and ginger, and cook for 4-5 minutes, until softened.

Add the carrots and cook for an additional 4-5 minutes.

Add the miso paste and vegetable stock, sprinkle with salt and pepper, and bring to a boil.

Reduce heat to low and simmer for 20 minutes or until carrots are tender.

Blend until smooth, and then divide into bowls for serving.

Garnish with the spring onion, a sprinkle of toasted sesame seeds, and a drizzle of sesame oil.

ENJOY!!

Standard
Dairy Free, Dips, Condiments and Dressings, Gluten Free, Recipes, Vegan

Harissa

Harissa

Mmmmm . . . Spicy chili goodness!!

Harissa is a spiced chili paste originally from Tunisia, but its use has spread to other North African and Middle Eastern countries . The main ingredients are hot chili peppers and spices and herbs such as garlic paste, coriander, red chili powder, caraway as well as some kind of vegetable or olive oil.  Recipes for harissa vary according to region and country; variations can include the addition of cumin, red peppers, garlic, coriander, and lemon juice. In Saharan regions, they add a smokey flavor to harissa.

I needed a harissa paste to use in my Day 23- Harissa Ravioli post, and a friend suggested that I try making my own. Brilliant idea!! After a bit of research I found a recipe on the Food52 blog site, that seemed to be easy enough, use ingredients I mostly already had around the house, and was open to my own interpretation. You are supposed to let the harissa paste sit for over 24 hours before using, but since I needed it for a particular recipe I could not wait. My version of harissa worked perfectly in the dish, and I cannot wait to taste the intensity of the flavors 24 hours from now.

Harissa

MAKES: approx. 1 1/2 cups

INGREDIENTS

  • 1 teaspoon cumin seeds
  • 1 teaspoon coriander seeds
  • 1/2 teaspoon caraway seeds
  • 1/2 teaspoon smoked paprika
  • 3 garlic cloves
  • 2-3 red jalapeno or serrano chiles, stemmed, chopped with seeds (the more you add, the hotter the harissa)
  • 2 large or 3 medium red bell peppers, roasted, peeled and seeded, coarsely chopped (I actually used jarred roasted red peppers and it worked just as good)
  • Extra-virgin olive oil
  • 1 teaspoon freshly ground black pepper
  • 1/2 teaspoon sea salt, or to taste

Toast cumin, coriander and caraway seeds in a dry skillet over medium heat until aromatic, 1 minute. Transfer to a mortar with pestle, and grind seeds to a fine powder.

Combine ground seeds, garlic, smoked paprika, chiles, red peppers and 1 tablespoon olive oil in bowl of food processor. Process, adding additional olive oil if necessary, for a thick sauce-like consistency. Add ground pepper and salt.

Let harissa sit at least one hour and up to 24 hours before serving. (Refrigerate until use.)

ENJOY!!

Standard
100 Days Project, Dairy Free, Gluten Free, Recipes, Salads, Side Dish, Vegan

Day 22 – Wild Rice Salad

Day22

Mmmmm . . . I love the nuttiness of Wild Rice and I am constantly on the look out for new ways of preparing it.

Wild rice is the grain from four species of grasses of the genus Zizania, which has been historically gathered and eaten in both North America and China.  This type of rice grain has a chewy outer sheath with a tender inner grain that has a slightly nutty taste.  Because of its nutritional value and taste, wild rice increased in popularity in the late 20th century, and commercial cultivation began in the US and Canada to supply the increased demand.  Typically sold as a dried whole grain, wild rice is high in protein, the amino acid lysine, dietary fiber, B Vitamins, minerals, it is low in fat, and like other rice varieties it is gluten free.

I found this recipe from Yotam Ottolenghi , a London based chef who is a rising star of the cooking world. His food tends to combine simple raw ingredients with influences from his Mediterranean background. I am already familiar with Ottolenghi’s vegetarian cookbook “Plenty“, which I borrowed from a friend a while ago, and was very sad to have to give back. This made me very excited to find out that he shares recipes on his website and in his weekly Guardian newspaper column.  I think I will be spending some time on the Guardian website this weekend. Still, I would love to have the cook book in my collection . . . wink, wink,nudge, nudge . . .

Wild Rice Salad

by: Yotam Ottolenghi

SERVES: 4

INGREDIENTS

  • 250g/1 1/4 cups wild rice
  • 60g/ 1/3 cup peeled pistachio (I used almonds because I had them around the house)
  • 150g soft dried apricot, soaked in hot water for 5 minutes
  • 1 small bunch of mint, leaves picked
  • 1 small bunch of rocket
  • 3 spring onions, roughly chopped
  • Zest and juice of 1 lemon
  • 2 tbsp olive oil
  • 1 large clove of garlic, crushed
  • Sea salt and freshly ground black pepper

Place the rice in a large pot and cover with water, bring to the boil then reduce the heat and cook for 30-40 minutes, depending on the variety, or until the rice is cooked aldente. Alternatively you can cook the rice in a rice cooker with 2 1/2 cups of water. Drain the rice and rinse under cold water.

While the rice is cooking, roast the pistachio or almonds in a dry pan over a medium heat for 8-10 minutes. Coarsely chop them with a large knife. Drain the apricot and coarsely chop them too.

In a bowl mix the rice, apricots and pistachios, and then add the rest of the ingredients, toss well and season with salt and pepper to taste.

ENJOY!!


Standard
100 Days Project, Dairy Free, Gluten Free, Recipes, Soups, Vegan

Day 19 – Split Pea Soup with Crispy Onion Strings

Day19

Mmmm . . . Split Pea Soup . . . one of my favorites . . .

Although this recipe, from The Curvy Carrot, is different because instead of the just using split peas, it has other vegetables like carrot, celery, and potato to round out and add flavor to what can sometimes be a overwhelming pea flavored soup. Also, those crispy onion strings really make the dish adding just that nice bit of crunchy salty texture.  A friend who had dinner with me said it was “almost” like having crispy bits of bacon on top, making sure to use finger quotes when saying “almost”.

For the crispy onion strings, I used these little smoked red onions I got from the Matakana Markets on my trip up north over the weekend. I suspect the smokiness of the onions added to “almost” bacon quality of the onion strings. I love escaping from Auckland for the day and heading to any of the great markets in the fringe areas around Auckland. Only about an hour north of Auckland, Matakana is one of my favorite destinations for this, as the market is full of stalls with fun foods. There is usually live music of some sort, and if the weather is nice you can sit by the river and much on the treats you have just purchased.

In 1999 – 2000 I live in Sydney, Australia and worked as a waitress, hostess, bartender, dishwasher and kitchen hand at a cafe/jazz bar called Soup Plus. That Chef’s theory about making soup is that there can never be enough butter. The amount of butter he used to put in the soups was enough to make you second guess eating them. Yet the soups always tasted fantastic having this rich creamy texture that I can only assume came from the overdose of butter. This has stayed with me, and to this day I never make a soup without adding just a little bit of butter. Without butter this soup would be Vegan, but if you are not concerned about such things, trust me  . . . add the butter.

Split Pea Soup with Crispy Onion Strings

adapted from: The Curvy Carrot

MAKES: 8, 1 cup servings

INGREDIENTS

For the soup:

  • 1 pound/2 cups dried split green peas
  • 3 quarts/12 cups water
  • 2 tablespoons vegetable oil
  • 2 stalks celery, diced into 1/2-inch/10mm pieces
  • 2 carrots, diced into 1/2-inch/10mm pieces
  • 1 medium yellow onion, diced
  • 1 large leek, sliced
  • 1 teaspoon dried thyme
  • 2 bay leaves
  • 2 medium Yukon Gold potatoes, cut into 1-inch pieces
  • 50g/ 3 tablespoons butter, chopped into smaller pieces (this is optional)
  • Salt and pepper, to taste

For the onion strings:

  • 1 small onion, sliced thinly
  • 1 teaspoon vegetable oil
  • 1 tablespoon flour
  • Salt and pepper, to taste
  • Smoked sea salt for final garnish, optional

In a large stock pot over high heat, bring the peas and water to a boil. Let the peas boil, uncovered, for two minutes.

Reduce the heat to low, cover, and simmer for 1 hour. (This will dissolve your peas)

After the hour is over, add the oil to a medium skillet over medium-high heat. Add the celery, carrot, onion, leek, and thyme to the oil and cook, stirring frequently, until softened, about 8-10 minutes. Add the vegetable mixture to the stock pot followed by the bay leaves and potatoes, and butter (if you are using it) and simmer over medium-low heat, stirring occasionally.

Continue simmering, stirring occasionally, until the soup has thickened, about 2-3 hours.

Season to taste with salt and pepper

ENJOY!!

Standard
100 Days Project, Dairy Free, Gluten Free, Mains, Recipes, Vegan

Day 18 – Teriyaki Tempeh Bowl

Day18

Asian style food is usually my fall back for a quick, healthy, flavorful meal when I am running short of time.

I got home really late from work yesterday, and realized I had not eaten much during the busy day so needed to make something quick, healthy, and packed with protein. It seemed like the perfect opportunity to try this recipe for a Teriyaki Tempeh Bowl sent to me by a friend who, although she is not vegetarian herself, cooks amazing food for her vegetarian husband.

Tempeh is a traditional soy product originally from Indonesia, most likely from the island of Java. Like Tofu, tempeh is made from soybeans, but it is a whole soybean product with different nutritional characteristics and a very unique textural quality made by a natural culturing and controlled fermentation process that binds whole soybeans into a cake form. Tempeh’s fermentation process and use of the whole soybean give it a higher content of protein, dietary fiber, and vitamins than Tofu.

Teriyaki is a Japanese cooking style in which foods are broiled or grilled while being basted in a marinade based on soy sauce, mirin (rice vinegar), and sugar. Modern or store bought Teriyaki Sauce also may include honey, garlic, ginger, and chili, but these are not ingredients common to to traditional Japanese cooking.

So this meal is a bit of a mash up of cultures between Indonesian Tempeh and Japanese Teriyaki Sauce, but all together it was just what I needed for a late night quick protein fix.

Teriyaki Tempeh Bowl

MAKES: 2 Servings

INGREDIENTS

  • 250g (one packet) of tempeh, sliced
  • 1 tablespoon sesame oil
  • store bought or homemade Teriyaki Sauce
  • 1 small head of broccoli
  • 1 carrot, cut into sticks
  • 1 small red onion
  • 2 small heads of Bok Choy
  • 1 cup mushrooms, sliced
  • 1 small zucchini (courgette), sliced
  • 1 green onion (spring onion), for garnish
  • 1 cup brown rice
  • 2 cups water

Place the 1 cup brown rice and 2 cups water into a rice cooker or pot on the stove and simmer until done.

Heat the sesame oil in a medium pan and add the Tempeh slices cooking them until brown on both sides. Add enough Teriyaki sauce to cover the tempeh and let simmer in a covered pan for about 5 minutes, turning the Tempeh slices over about half way through.

While Tempeh is simmering, steam the vegetables over a pot of boiling water for only a few minutes, just until the colours brighten and the vegetables start to lose their rawness. Be careful, you do not want to over steam the vegetables.

Build your bowl with a serving of brown rice on the bottom, adding a portion of the steamed vegetables, and topped with a few pieces of the Teriyaki Tempeh and some additional Teriyaki Sauce splashed on top. Garnish with a sprinkle of the chopped green onion.

ENJOY!!

Standard
100 Days Project, Dairy Free, Gluten Free, Recipes, Side Dish, Vegan

Day 15 – Horseradish Potato Salad

Day15

Summer or Winter, it is always a good time to make potato salad.

It makes the perfect accompaniment for the summertime BBQs, and a hearty side dish for meals on those cold winter nights. Usually potato salad is made with cream, sour cream or mayonnaise, so I was really excited to find this vegan version that can be made for everyone to enjoy. This recipe from Karina: The Gluten Free Goddess uses olive oil and apple cider vinegar in place of the mayonnaise dressing.

Horseradish, which is a spicy root vegetable closely related to mustard, wasabi, broccoli, and cabbage, is the main flavor element of this recipe.  I surprisingly found this ingredient (either fresh or prepared) vary hard to find in New Zealand. If you can only find it fresh make sure to process it into a paste in a food processor adding a slight bit of water and white vinegar, or else it will go brown. I finally found a prepared version at Farro Fresh, a high-end Auckland based food market. If you live outside of Auckland, you should be able to find it at a similar type of store. Make sure not to get a prepared version that has dairy mixed in, it should only have water , salt, or vinegar.

Usually, I like to add pickles to my potato salad, but that did not quite seem to be the right thing to go with the flavors in this recipe. So I had a quick look in the fridge and came up with the perfect solution, Capers!!! These added the perfect little pop of salty goodness.

This potato salad recipe turned out so full of flavor, and made a perfect side dish to go with the left over Lentil and Chickpea Sliders from my Day 14 post.

Horseradish Potato Salad

adapted from: The Gluten Free Goddess

INGREDIENTS:

  • 2 pounds or 1 kg small red potatoes
  • Sea salt
  • 1/4 cup fruity tasting extra virgin olive oil, as needed
  • 5 tablespoons apple cider
  • 1 smallish red onion, finely diced
  • 2 tablespoons prepared horseradish
  • Sea salt and fresh ground black pepper
  • 2 tablespoons chopped fresh parsley
  • 2 teaspoons dill, to taste
  • 1 teaspoon caraway seeds
  • 2 tablespoons capers

Wash and cut up the red potatoes, toss them into a pot of salted fresh water. Bring the water to a boil and simmer the potatoes until they are fork tender. Drain well.

Pour the cooked potatoes into a large bowl. While the potatoes are still warm, sprinkle with sea salt and drizzle with extra virgin olive oil and vinegar. Toss to coat and to soften the edges of the potatoes pieces a bit. Add the diced onion, horseradish and toss to distribute. Taste and season with more sea salt and fresh ground pepper. Add the chopped parsley, dill, caraway, and capers; mix. Taste test, and add more olive oil or vinegar, sea salt or herbs, if needed.

Serve warm, or cover and chill.

ENJOY!!

Standard
100 Days Project, Gluten Free, Party Food, Recipes, Vegan

Day 13 – Smokey Sweet Maple Chickpea Snacks

Day13

Have you ever bought those over priced crunchy flavored chickpea snacks from the natural foods store?

I know I have, because they usually just taste too good and are a quick healthy high protein snack to have around. Realistically though, I figured they should not be too hard to make and decided to see what Google had to say about the idea. I ended up downloading about half a dozen recipes from various sources, which when it came down to it were all pretty much the same except for the choice of spice mixture to use for flavoring the chickpeas. Some versions were sweet, some salty, some curried, and some with herbs, but I tend to like when savory and sweet are used together, which is why this recipe by Jerry James Stone for a Maple Seat Salt variation caught my attention. Another recipe used smoked paprika in the seasoning, and that got my brain thinking that maple, sea salt, and smoked paprika would make a really yummy flavor combination, and it did!!

Overall, they did not turn out quite as I had imagined. The seasoning was great, but the chickpeas themselves mostly either burned, or were too soft in the middle. There were very few on the tray that actually came out as crunchy as the ones you can buy from the store. Even not as crunchy as expected, they still made a great late morning snack, and would go quiet nicely with an after work beer (or 2). I will definitely have to try again experimenting with different flavor combinations, cooking times, and temperatures.

I wonder if roasting the chickpeas and then dehydrating them might be an easier way to go. Does anyone have a food dehydrator I can borrow?

Smokey Sweet Maple Chickpea Snacks

INGREDIENTS

  • 15 Ounces or 425g of cooked Chickpeas
  • 1 Tablespoon real Maple syrup (imitation Maple Syrup does not have the same depth of flavor)
  • ½ Teaspoon Brown Sugar
  • ½ Teaspoon Sea Salt
  • 1/4 Teaspoon  La Chinata Smoked Paprika

Preheat the oven to 180 degrees C.

Strain the chickpeas and rinse them clean.

Place a paper towel on a flat surface and spread the chickpeas on to it so that they are a single layer. Place another towel on top of them, rolling them around, until they are completely dry.

Add the seasonings to the chickpeas, and then place them on a baking sheet lined with parchment paper.

Roast them for about 40 minutes until they are a deep golden brown and very crunchy, making sure to not burn them.

ENJOY!!

Standard
100 Days Project, Dairy Free, Food, Gluten Free, Mains, Vegan

Day 11 – Roasted Garlic & Caramelized Vegetable Tostada

Day11

I had a friend staying with me from Wellington last night so I decided to make something a bit fancy . . .

Especially when that friend is following my Herbivore posts and after reading my Day 9 – World Gin Day French 75  post, he shows up on my doorstep with a bottle of very good gin. Houseguests that arrive with a bottle of good gin definitely deserve a special meal.

Being from the United States and growing up in South Florida, which has a large Latino population, Mexican food is one of my favorite types of food to make.  Although, this recipe I would consider more Modern Mexican, which brings up the question of what is actually the difference between Tex-Mex, traditional Mexican, and Modern Mexican food.

Tex-Mex originated with Tejanos, Texans of Mexican descent, as a mix of native Mexican and Spanish foods when Texas was part of New Spain and later Mexico. It became Americanized in the 20th century, when modern American processed foods (like yellow cheese), became cheap and readily available.  In the 1960s, Americanized Tex-Mex food became a popular cuisine, characterized by heavy use of shredded cheese, meat (particularly beef and pork), beans, shredded lettuce, fresh chopped tomatoes, big dallops of sour cream, the heavy handed use of chili, and wheat based tortillas. Dishes such as Texas-style chili con carne, chimichangas, burritos, nachos, and fajitas are all Tex-Mex inventions.

Alternatively, Mexican food is complex and uses subtle flavor combinations from native ingredients including tomatoes, squashes, beans, avocados, plantains, cocoa, cinnamon, vanilla, tropical fruits, and corn tortillas, as well as other forms of lime treated corn like atole, pozol, tamales, and sopes. Despite the introduction of wheat and rice to Mexico, the basic starch remains corn in almost all areas of the country.  Mexican food has a reputation for being spicy, but its seasoning can be better described as strong and flavorful; chili peppers being used for their flavors and not just their heat. Traditional Mexican food has a base of corn, beans, and chili using meat and dairy sparingly concentrating on the dishes other ingredients and flavors.

I consider this recipe for Roasted Garlic and Caramelized Vegetable Tostada to be Modern Mexican, as it combines ingredients and a type of dish that is traditional with popular contemporary western flavors like balsamic vinegar and roasted garlic. The original recipe from the How Sweet It Is blog, which typically focuses more on deserts and sweet treats than savory mains, calls for using shredded cheddar cheese and Greek yogurt or sour cream, but I chose to substitute the shredded cheese with cow’s milk feta (which is closer to traditional queso fresco) and leave off the Greek yogurt/sour cream, which I thought would drown out the more subtle flavors.

This recipe can easily be made dairy free and Vegan by leaving off the cheese.

Roasted Garlic & Caramelized Vegetable Tostada

adapted from: How Sweet It Is

MAKES: 4 tostadas

INGREDIENTS

  • 1 bulb of roasted garlic
  • 3 teaspoons olive oil
  • 1 small sweet potato, cubed
  • 1/2 red onion, chopped
  • 1/2 red pepper, chopped
  • 1/2 green pepper, chopped
  • 1 cup sliced mushrooms
  • 2/3 cup corn (if frozen, thaw and pat dry)
  • 1/4 teaspoon salt
  • 1/4 teaspoon pepper
  • 2 tablespoons balsamic vinegar
  • 2/3 cup black beans

for topping:

  • 1 avocado, chopped
  • 1/2 cup cow’s milk feta, crumbled
  • fresh cilantro/coriander
  • lime wedges

for base:

  • 4 corn tortillas
  • olive oil, for brushing

Preheat oven to 400 degrees F or 200 degrees C.

Line a baking sheet or grease the try with olive oil.

In a large bowl, combine sweet potatoes, peppers, onions, corn and mushrooms. Drizzle with 3 tablespoons of olive oil, then sprinkle with salt and pepper and toss to coat. Spread on a baking sheet and roast for 20 minutes. Toss vegetables with the balsamic vinegar, and roast for 15-20 minutes more until caramelized and sweet.

While veggies are roasting, heat a skillet over medium-high heat. Brush each tortilla (front and back) with olive oil, then place one at a time in the skillet until crisp and bubbly, being careful they don’t burn. Each tortilla should take about 5 minutes or so. Remove tortillas and place on a wire rack or plate to cool.

Return the balsamic roasted veggies back into the bowl, add in the black beans, and mix. Squeeze out the roasted garlic cloves and mix thoroughly into the vegetables.

Layer each tortilla with a big helping of the vegetables and garlic, then top with avocado,
cilantro/corriander, cheese and lime juice.

ENJOY!!

Standard