100 Days Project, Dairy Free, Dips, Condiments and Dressings, Gluten Free, Mains, Recipes, Side Dish, Vegan

Day 44 – Slow Cooked Barbecue Baked Beans

Day44

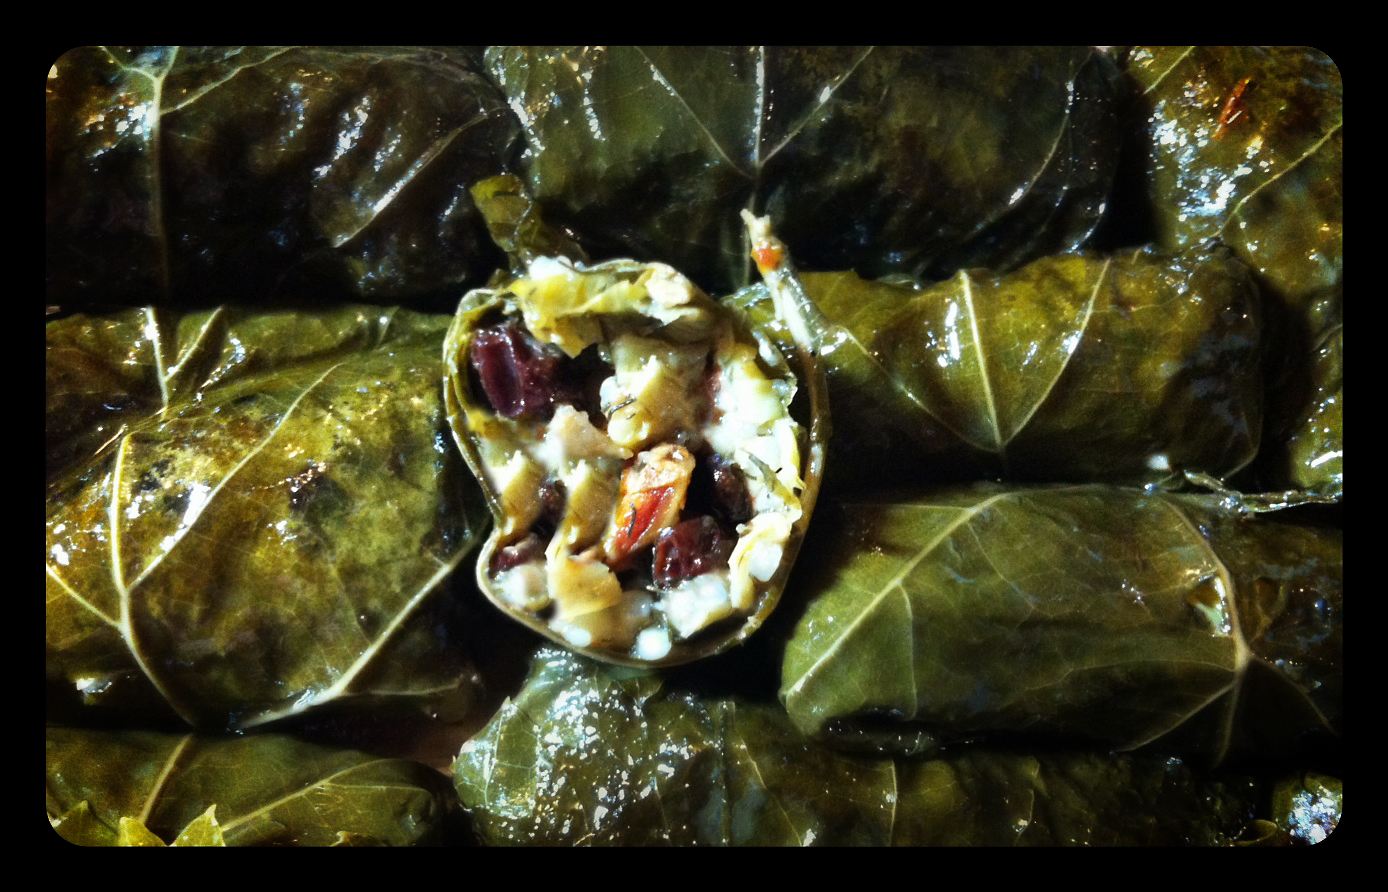
Her is another great slow cooker recipe for you my Herbivores . . .

The best thing about slow cookers is how you can pop everything into the insert the night before or in the morning, the slow cooker does all the work, and you get to eat the yummy results.  This recipe for slow cooked barbecue baked beans, from Skinny Ms, is not exception.

I love the smokey maple flavor of a good BBQ sauce, and unfortunately, until recently, that can be hard to find here in New Zealand. I used to make the trip out to Martha’s Backyard, the American Store in Mt. Wellington, just for BBQ sauce. Luckily now some of the fancier food stores like Nosh and Farro are bringing BBQ sauce in from the US. Even one of my favorite brands, Kansas City Cowtown BBQ Sauce. I got so excited when I saw this at a friend’s house that she bought me a bottle the next time she came over for dinner. A friend that brings good BBQ sauce is a good friend indeed!! The Bonz Kajun Kitchen in Elliott Stables makes great locally made BBQ sauce that they bottle and sell, but you have to ask nicely for a vegetarian version, because he will normally put pig fat drippings in his sauce otherwise.

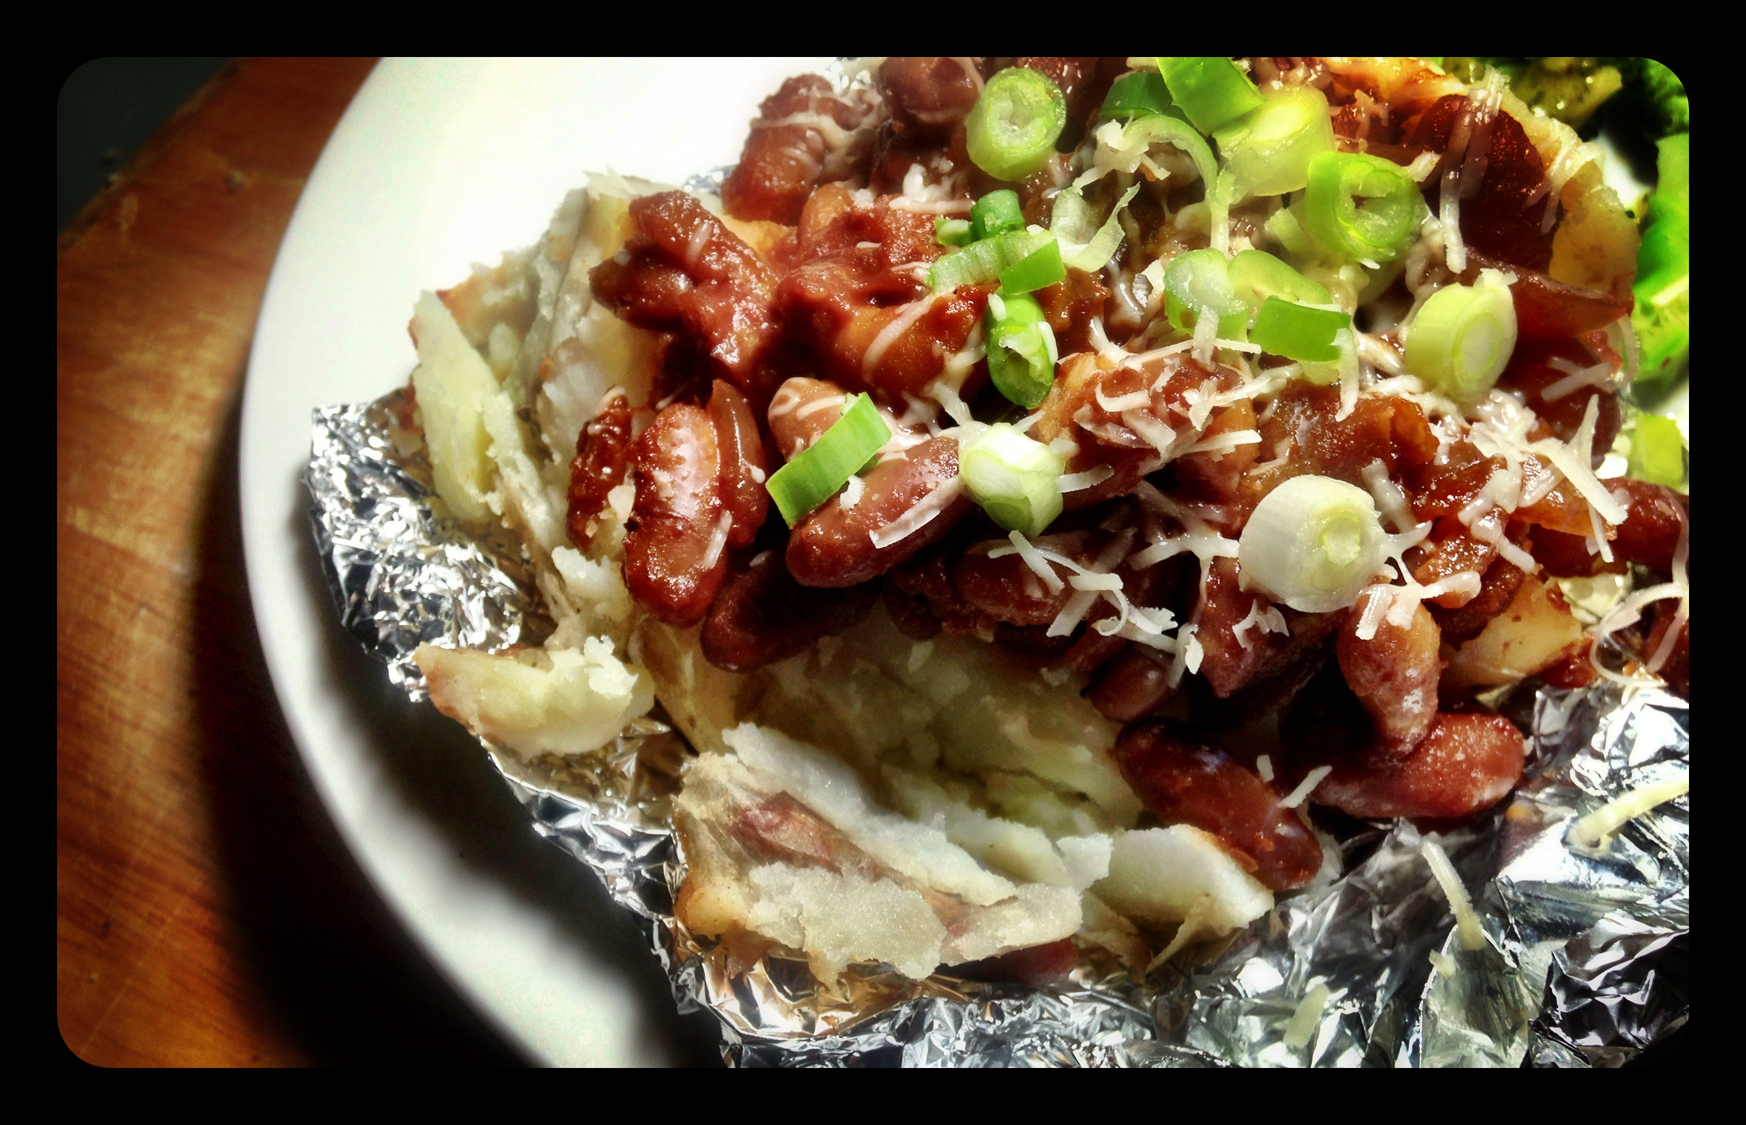
The thing that makes BBQ sauce so good is the combination of smokey, savoury, spicy, and sweet all perfectly balanced for optimal enjoyment.  When slow cooked with these beans, it makes a great side dish or can easily be turned into a main, like I did, by spooning the beans over a baked potato and adding a bit of spring onion/green onion and cheese.  A Kiwi favorite is baked beans on toast, and this recipe can be be used to make a great version of that dish as well. Add a fried egg on top, and you got a yummy savoury breakfast!!

If you do not have access to a good BBQ sauce, you can easily make your own with the recipe included below.

Slow Cooked Barbecue Baked Beans

MAKES: 8, 1 cup servings

INGREDIENTS

  • 1 sweet onion, diced
  •  1.7 kilograms or 60 ounces cooked Cannellini beans, drained and rinsed
  • 1 1/4 cup barbecue sauce (recipe below)
  • 1/2 cup unrefined sweetener, (choices of unrefined sweeteners: Madhava Coconut Sugar, honey, molasses, pure maple syrup, sucanat, sorghum)
  • 2 tablespoons yellow mustard
  • 1/2 teaspoon cayenne pepper
  • 1/2 teaspoon freshly ground black pepper
  • Sea salt to taste

for BBQ Sauce:

  • 1 tablespoon vegetable oil
  • 1 sweet onion, finely diced
  • 1 clove garlic, minced
  • 1 – 230 gram or 8 ounce can tomato puree
  • 1/2 cup mild molasses or sorghum
  • 1/4 cup balsamic vinegar
  • 2 teaspoons Dijon mustard
  • 1/2 teaspoon cayenne pepper
  • 2 teaspoons chili powder
  • 1/4 teaspoon black pepper
  • Sea Salt to taste

Add all ingredients for the BBQ beans  into the slow-cooker.  For the unrefined sweetener, I used a combination of golden syrup and molasses, but any of the other options will do).  Cover, turn to low and cook 6-8 hours.

It is as simple at that!!

To make your own Barbecue Sauce:

In a medium sauce pan add canola oil, turn to medium-low heat and saute onion and garlic until tender, about 5 minutes. Add the remaining barbecue sauce ingredients, stir and simmer until sauce has thickened, about 30 minutes. Viola!!

ENJOY!!

Standard
100 Days Project, Dairy Free, Gluten Free, Party Food, Recipes, Side Dish, Snacks, Vegan

Day 42 – Panelle

Day42Mmmm . . . Deep fried chickpea goodness . . .

A friend of mine posted this recipe, from the New York Times, on her Facebook page, and I knew I was going to have to try making it at some point. Panelle is a type of Sicilian street food that is very similar to polenta, which is made of corn meal. Instead, Panelle is made from chickpea flour (Gram flour), which means it has the added benefit for vegetarians of being high in protein. They make a tasty and interesting and healthier alternative to potato fries, and can be used in the same way for a quick, but filling, snack

These “chips” went extremely well with the left over Warm Chickpea & Artichoke Pâté from my Day 41 post of the 100 Days Project challege.

Panelle

from: The New York Times

INGREDIENTS

  • Vegetable or olive oil for greasing and frying
  • 1 cup chickpea flour
  • Salt and freshly ground black pepper
  • 2 tablespoons olive oil
  • 1 lemon, cut into wedges

Grease an 8-by-8 baking dish or a quarter sheet pan with some oil.

Bring 2 cups water to a boil in a small saucepan. Put the chickpea flour in a large bowl, and when the water comes to a boil, gradually add it to the chickpea flour, whisking constantly to prevent lumps. Scrape the mixture into the saucepan you used to boil the water, and sprinkle with salt and pepper.  Bring the chickpea flour mixture up to a boil, stir in 2 tablespoons of olive oil, and then reduce to a gentle simmer. Only continue cooking for about a minute.

Scoop the chickpea mixture onto the baking dish or sheet pan and spread it into an even layer. Let it cool, and cover loosely with parchment or plastic. Refrigerate for at least 30 minutes, or up to 24 hours.

Put at least 15mm or 1/4 inch oil in a large skillet over medium heat.  Cut the chickpea mixture into “French Fries”, about 3 inches long and blot any excess moisture with a paper towel. Working in batches, gently drop them into the hot oil. Cook, rotating them occasionally until they’re golden all over, 3 to 4 minutes. Drain fries on paper towels and immediately sprinkle with salt and lots of pepper. Serve hot, with lemon wedges.

Pour yourself a glass of wine and  . . .

ENJOY!!

Standard
100 Days Project, Dairy Free, Gluten Free, Party Food, Recipes, Side Dish, Snacks, Vegan

Day 37 – Dolmades

Day37

Since I started off last night with my Day 36 Feta & Pesto Stuffed Peppadew Peppers post, I decided to keep up the theme for the weekend with recipes for small plate tapas type dishes. Dolmades seemed like the perfect fit!!

Dolmades or Dolma are a stuffed vegetable dish common in the Balkans and surrounding regions of the Middle East. The word Dolma comes from the Turkish for “stuffed thing”. Generally, grape or cabbage leaves are wrapped around a rice based filling, that can be meat or vegetarian, and includes onion, herbs like dill, mint or parsley and spices. While meat Dolma are served warm, vegetarian ones are often served cold or at room temperature. There are numerous variations of ingredients and fillings across the many countries that make a Dolma-like dish.

I first made and had Dolmades as a pre-teen at summer camp. Two kids from every cabin had to help out the kitchen staff with food prep every day. Probably not hard to believe that this was one of my favorite tasks on the chore rotation. I remember one day when we came in, there was a big industrial sized bowl of rice filling and all these grape leaves. I had never thought about eating an actual leaf before (not including lettuce) and thought this was a bit strange. I followed instructions on how to fill and roll the grape leaves into Dolmades, and was pleasantly surprised when it came to dinner time that this strange dish was actually quite yummy!! Although I have eaten Dolmades many times since then, this was probably the last time I tried making them myself until today.

Dolmades

adpated from: Kitchen Classics – Gourmet Vegetarian

MAKES: approx. 40 Dolma

INGREDIENTS

  • 6 spring onion (green onions)
  • 1/2 cup olive oil
  • 3/4 cup long grain rice
  • 15 grams or 1/2 ounce fresh mint
  • 2 tablespoons chopped dill
  • 2/3 cup lemon juice
  • salt and pepper, to taste
  • 1/4 cup currants
  • 1/4 cup sun-dried tomatoes, finely chopped
  • 1/4 cup artichoke hearts, finely chopped
  • 1/4 cup pine nuts, toasted.
  • 235 grams or 8 1/2 ounce packaged pickled grape leaves
  • 2 tablespoons olive oil, extra

Heat the oil in a medium sized sauce pan. Chop the spring onions and add them to the pan, cooking them over a medium heat for only one minute.  Stir in the rice, mint, dill, half the lemon juice, and salt and pepper to taste. Add 1 cup of water and bring to a boil, then reduce heat, cover, and simmer for 20 minutes.

Dry roast the pine nuts until they are toasted and golden brown.

Remove the lid, and fork through the currants, sun-dried tomatoes, artichokes, and toasted pine nuts. Cover with a paper towel, then the lid, and leave to one side to cool.

Gently rinse and separate the grape leave, then pat dry with a paper towel and trim any thick stems off with scissors.

Line the base of a 20cm or 8 inch pot with any torn of misshapen leaves. Choose the larger leaves for filling and sue the smaller ones to patch any gaps.

Place a leaf shiny side down, vein side up,  on a cutting board. Spoon a tablespoon of filling into the center of the leaf.  Bring in the sides, and roll up tightly from the stem end of the leaf. Place seam side down in the base of the leaf lined pot arranging them close together in a single layer.

Pour int he rest of the lemon juice, the extra oil , and enough water to just cover the top of the dolmades. Cover them with an inverted plate and some sort of weight to firmly compress the dolmades and keep them in place while cooking (I had trouble finding something for this, but a tin of canned vegetables might work). Cover with the lid, and bring the liquid up to a boil reducing it to a simmer for 45 minutes. Let them cool and serve at room temperature.

These would make a great side dish to go with my Lebanese Red Lentil Soup.

ENJOY!!

Standard
100 Days Project, Recipes, Side Dish, Vegan (with substitutions)

Day 27 – Crumbed Asparagus

day27

Another busy day needs another quick, simple, and yummy recipe . . .

This recipe for Crumbed Asparagus, by The Cozy Herbivore, seemed to be the perfect side dish for the left over Creamy Pearl Barley & Porcini Mushroom Risotto from my Day 25 post. It has lovely flavors of lemon, honey, garlic, and chive added into the freshness of the roast asparagus, and the crunchiness of the panko bread crumb is one of the best parts of the dish.

Asparagus has been eaten as a vegetable and used as a medicine, since ancient times.  It was known in Syria and in Spain, and Greeks and Romans ate it fresh when in season and dried it for eating during the winter.  A recipe for cooking asparagus is in the oldest surviving book of recipes, and the ancient Greek physicians used asparagus as a beneficial herb during the second century AD. By 1469, asparagus was cultivated in French monasteries, and asparagus became available to the New World around 1850.  Because once the buds start to open, the shoots will turn “woody”, only young asparagus shoots tend to be eaten.  Asparagus is low in calories, very low in sodium, and is a good source of many other vitamins and minerals.

I know winter in New Zealand is not asparagus season, so I am being a bit naughty, but this dish was worth the ridiculous amount I paid for the asparagus at the food store.

The recipe can easily be made gluten free by substitutng the bread crumbs for gluten free bread crumbs, and can be made Vegan by substituting the honey for agave nectar or brown rice syrup, and leaving out the parmesan.

Crumbed Asparagus

adapted from: The Cozy Herbivore

MAKES: 2-3 servings

INGREDIENTS

for the asparagus:

  • 1 pound fresh asparagus
  • 1 medium lemon
  • 1 teaspoon honey
  • 1 tablespoon extra-virgin olive oil
  • 1/2 teaspoon dried garlic granules
  • sea salt & freshly cracked pepper, to taste

for the crumb topping:

  • 1 cup bread crumbs
  • 1/4 cup finely shredded parmesan cheese
  • 1 tablespoon finely minced fresh flat-leafed parsley
  • 1 teaspoon finely minced fresh chives
  • 2 tablespoons extra-virgin olive oil
  • sea salt & freshly cracked pepper, to taste

Preheat oven to 400 degrees Fahrenheit.

Trim asparagus spears by snapping off woody ends. The asparagus will break naturally between the fresh stalk and the tough end. Discard the ends.

Juice and zest lemon. Finely mince lemon zest and set aside to use in crumb topping.

In a small bowl whisk together lemon juice, honey, garlic granules and olive oil.  Add a pinch of sea salt & a few cracks of pepper. Taste and adjust seasonings accordingly.

Toss trimmed asparagus spears in lemon juice mixture. Arrange coated spears in a single layer in a casserole dish, and pour remaining lemon juice mixture over.

Bake until just tender, about 10 minutes. They should feel slightly soft and be easily pierced with a fork without being mushy.

While the asparagus is roasting, prepare crumb topping. In a large bowl, combine bread crumbs, cheese, minced herbs, olive oil and 1 teaspoon of the finely minced lemon zest. Using freshly washed hands, toss the mixture together until combined. Add a generous pinch of sea salt & a few cracks of pepper. Taste
and adjust seasonings accordingly.

When asparagus is done roasting, pour bread crumb mixture over and place under the broiler of your oven for one minute, or until browned and toasty. This can very quickly turn from brown to burned so keep a careful watch and do not walk away.

When the crumb has browned, take the baking dish out of the oven and serve,

ENJOY!!

Standard
100 Days Project, Mains, Side Dish

Day 23 – Harissa Raviloi

Day23

It was a bright sunny Winter’s day here in Auckland . . . my favorite kind of day!!

Blue skies and sunshine, with a slight chill in the air, always makes me want to go to the markets. I was looking through a couple of my Heidi Swanson cookbooks over coffee this morning, and this recipe for Harissa Ravioli caught my eye.  After coffee I headed to the La Cigale French Market, which is pretty much my favorite Auckland Central market destination. The stalls have such a delicious range of foodie treats, hot coffee, well priced vegetables, and yummy baked goods. Today, there happened to be someone selling fresh ravioli, and I figured something in the universe was telling me to make this recipe.  I purchased the spinach ravioli, which I thought should go well with the harissa and broccoli flavors, but in hind sight the pumpkin ravioli probably would have done the trick just as well.

The main flavor component of the sauce is harissa, a spiced chili paste originally from Tunisia. You can usually find this as a pre-made condiment in middle eastern or high-end food stores, but I decided to make my own; click here for the recipe. Supposedly you need to leave it for 24 hours to reach full flavor, but I used it right away and it still tasted great, I can only imagine with delight how much more flavor it will have later on.

This recipe came out quite tasty . . .  The flavor combination of harissa, lemon, good quality olive oil, toasted seeds and feta made a delicious sauce for the ravioli and was a great way to spice up the broccoli.  I am not an olive person, so I left that ingredient off, but to each their own. I suspect broccoli with this same harissa oil and toppings would make an excellent side dish on its own right. This theory may have to be tested later on this week.

Harissa Ravioli

by: Heidi Swanson

SERVES: 4

INGREDIENTS

  • 1 clove garlic, smashed
  • 1/4 teaspoon sea salt
  • 2 tablespoons fresh lemon juice
  • 2 tablespoons harissa paste
  • 1/4 cup good quality extra virgin olive oil
  • 12 ounces or 340g fresh or frozen cheese ravioli or tortellini
  • 8 ounces or 225g broccoli florets or broccolini, trimmed into bite sized pieces
  • 1/4 cup pepitas (pumpkin seeds), sliced almonds, or pine nuts (I used a combination of all three), toasted
  • 1/4 cup crumbled feta cheese
  • 5 or 6 black oil cured olives, pitted and torn into pieces

Bring a large pot of water to boil.

In the meantime, make the harissa oil. Sprinkle the smashed garlic clove with the salt and chop into a paste. Put this aside in a small bowl and stir in the lemon juice, harissa, and good quality olive oil. Taste and add more salt if needed.

When the water boils, salt it generously and add the ravioli cooking them until they float and are cooked through (about 1 to 2 minutes). around 30 seconds before you think the ravioli will be done add the broccoli to the pot, boil for the remaining time, and then drain into a colander.

Place the ravioli and broccoli into a large mixing bowl and toss with a couple spoonfuls of the harissa oil and most of the pepitas/almonds/pine nuts. Taste and add more salt, if needed.  Turn out onto a serving platter or plates and top with more harissa oil and the remaining pepitas/almonds/pine nuts, the feta, and olives.

ENJOY!!

Standard
100 Days Project, Dairy Free, Gluten Free, Recipes, Salads, Side Dish, Vegan

Day 22 – Wild Rice Salad

Day22

Mmmmm . . . I love the nuttiness of Wild Rice and I am constantly on the look out for new ways of preparing it.

Wild rice is the grain from four species of grasses of the genus Zizania, which has been historically gathered and eaten in both North America and China.  This type of rice grain has a chewy outer sheath with a tender inner grain that has a slightly nutty taste.  Because of its nutritional value and taste, wild rice increased in popularity in the late 20th century, and commercial cultivation began in the US and Canada to supply the increased demand.  Typically sold as a dried whole grain, wild rice is high in protein, the amino acid lysine, dietary fiber, B Vitamins, minerals, it is low in fat, and like other rice varieties it is gluten free.

I found this recipe from Yotam Ottolenghi , a London based chef who is a rising star of the cooking world. His food tends to combine simple raw ingredients with influences from his Mediterranean background. I am already familiar with Ottolenghi’s vegetarian cookbook “Plenty“, which I borrowed from a friend a while ago, and was very sad to have to give back. This made me very excited to find out that he shares recipes on his website and in his weekly Guardian newspaper column.  I think I will be spending some time on the Guardian website this weekend. Still, I would love to have the cook book in my collection . . . wink, wink,nudge, nudge . . .

Wild Rice Salad

by: Yotam Ottolenghi

SERVES: 4

INGREDIENTS

  • 250g/1 1/4 cups wild rice
  • 60g/ 1/3 cup peeled pistachio (I used almonds because I had them around the house)
  • 150g soft dried apricot, soaked in hot water for 5 minutes
  • 1 small bunch of mint, leaves picked
  • 1 small bunch of rocket
  • 3 spring onions, roughly chopped
  • Zest and juice of 1 lemon
  • 2 tbsp olive oil
  • 1 large clove of garlic, crushed
  • Sea salt and freshly ground black pepper

Place the rice in a large pot and cover with water, bring to the boil then reduce the heat and cook for 30-40 minutes, depending on the variety, or until the rice is cooked aldente. Alternatively you can cook the rice in a rice cooker with 2 1/2 cups of water. Drain the rice and rinse under cold water.

While the rice is cooking, roast the pistachio or almonds in a dry pan over a medium heat for 8-10 minutes. Coarsely chop them with a large knife. Drain the apricot and coarsely chop them too.

In a bowl mix the rice, apricots and pistachios, and then add the rest of the ingredients, toss well and season with salt and pepper to taste.

ENJOY!!


Standard
100 Days Project, Dairy Free, Gluten Free, Recipes, Side Dish, Vegan

Day 15 – Horseradish Potato Salad

Day15

Summer or Winter, it is always a good time to make potato salad.

It makes the perfect accompaniment for the summertime BBQs, and a hearty side dish for meals on those cold winter nights. Usually potato salad is made with cream, sour cream or mayonnaise, so I was really excited to find this vegan version that can be made for everyone to enjoy. This recipe from Karina: The Gluten Free Goddess uses olive oil and apple cider vinegar in place of the mayonnaise dressing.

Horseradish, which is a spicy root vegetable closely related to mustard, wasabi, broccoli, and cabbage, is the main flavor element of this recipe.  I surprisingly found this ingredient (either fresh or prepared) vary hard to find in New Zealand. If you can only find it fresh make sure to process it into a paste in a food processor adding a slight bit of water and white vinegar, or else it will go brown. I finally found a prepared version at Farro Fresh, a high-end Auckland based food market. If you live outside of Auckland, you should be able to find it at a similar type of store. Make sure not to get a prepared version that has dairy mixed in, it should only have water , salt, or vinegar.

Usually, I like to add pickles to my potato salad, but that did not quite seem to be the right thing to go with the flavors in this recipe. So I had a quick look in the fridge and came up with the perfect solution, Capers!!! These added the perfect little pop of salty goodness.

This potato salad recipe turned out so full of flavor, and made a perfect side dish to go with the left over Lentil and Chickpea Sliders from my Day 14 post.

Horseradish Potato Salad

adapted from: The Gluten Free Goddess

INGREDIENTS:

  • 2 pounds or 1 kg small red potatoes
  • Sea salt
  • 1/4 cup fruity tasting extra virgin olive oil, as needed
  • 5 tablespoons apple cider
  • 1 smallish red onion, finely diced
  • 2 tablespoons prepared horseradish
  • Sea salt and fresh ground black pepper
  • 2 tablespoons chopped fresh parsley
  • 2 teaspoons dill, to taste
  • 1 teaspoon caraway seeds
  • 2 tablespoons capers

Wash and cut up the red potatoes, toss them into a pot of salted fresh water. Bring the water to a boil and simmer the potatoes until they are fork tender. Drain well.

Pour the cooked potatoes into a large bowl. While the potatoes are still warm, sprinkle with sea salt and drizzle with extra virgin olive oil and vinegar. Toss to coat and to soften the edges of the potatoes pieces a bit. Add the diced onion, horseradish and toss to distribute. Taste and season with more sea salt and fresh ground pepper. Add the chopped parsley, dill, caraway, and capers; mix. Taste test, and add more olive oil or vinegar, sea salt or herbs, if needed.

Serve warm, or cover and chill.

ENJOY!!

Standard
Dairy Free, Gluten Free, Raw, Recipes, Salads, Side Dish, Vegan

Simple Raw Veggie Salad with Dill Dressing

dill dressing

This side salad is perfect for when you need something fresh and lite to go with you main meal.  I made it to go with the Creamy Leek and Brussels Sprout Soup in my Day 4 post, and the the crisp sweetness of the raw vegetables and fragrant dill nicely balance the creaminess and subtle spice of the soup.

I used cucumber, red capsicum, yellow capsicum, and avocado, but realistically that was just because those were the vegetables in my fridge. You can use any combination of vegetables you feel will go well together. Besides anything topped with this Dill Dressing will taste brilliant.

This does not take long at all to throw together, and can vary infinitely. You can also substitute other fresh herbs for the dill to make different types of dressing.

Simple Raw Salad with Dill Dressing

INGREDIENTS

for the salad

  • any assortment of raw vegetables (I used cucumber, red capsicum, yellow capsicum, and avocado)

for the dressing

  • 1 tablespoon white wine vinegar (if you do not have white wine vinegar, you can use 1 tablespoon white vinegar with 1/2 teaspoon sugar)
  • 1/4 teaspoon salt
  • 2 tablespoons minced fresh dill, or other fresh herb (you can also use dried herbs but it does not taste quite as nice)
  • 1/2 tablespoon Dijon mustard
  • 1/2 teaspoon minced shallot (you can substitute minced garlic if you do not happen to have a shallot around)
  • 1/4 cup extra-virgin olive oil

Place all the salad ingredients in a large bowl and set aside.

In a small bowl, whisk together the vinegar and salt until the salt dissolves. Add dill, mustard and shallot and whisk to combine. Slowly drizzle in olive oil, whisking constantly, until dressing is smooth and emulsified.  You can also use an immersion/stick blender to emulsify the dressing, which will take less time. Place all ingredients into the tall plastic cup that comes with most immersion/stick blenders, and whizz until dressing takes on a creamy white look. Pour dressing over salad and toss until all ingredients are evenly coated.

Additional Notes

Salad will keep, dressed and refrigerated, for up to 6 hours. For longer storage, keep chopped and assembled salad ingredients covered in the refrigerator up to 1 day ahead and toss with dressing just before serving.

ENJOY!!


Standard
Dairy Free, Gluten Free, Recipes, Side Dish, Vegan

Green Beans with Leek & Toasted Almonds

green beans

Hello Herbivores  . . . some people have been asking for the green beans recipe that was served along with the lentil sheppard’s pie in my Day 1 post. So, ask and you shall receive!!

This recipe originally came from Heidi Swanson of the 101 Cookbooks food blog. Her recipes are always simple, with minimal ingredients and packed full of flavor. I have to admit I have tweaked this recipe slightly myself (well then again, I tweak most recipes . . . that is half the fun of cooking).

INGREDIENTS

  • 2 large leeks, well washed, root end and tops trimmed, sliced lengthwise into quarters and then chopped into 15mm segments
  • 1/3 cup fresh dill, well chopped
  • 500g green beans, tops and tails trimmed and cut into 30mm segments
  • extra-virgin olive oil
  • fine-grain sea salt
  • slivered almonds

Toast the slivered Almonds in a dry skillet over a medium-high heat until they are nicely browned. Make sure you keep an eye on these as they can very quickly go from brown to burnt.

In a large thick-bottomed skillet of medium-high heat add a generous splash of olive oil, a generous pinch of salt and the leeks. Stir until the leeks are coated and glossy. Cook, stirring regularly until a lot of the leeks are golden and crispy. All in all it takes me roughly 7 – 10 minutes to brown the leeks.

At this point stir in the dill and almonds, and then stir in the green beans. Cook for a couple more minutes – just until the the beans brighten up and lose that raw
bite. Turn out into a bowl or onto a platter and serve immediately.

ENJOY!!

Standard