100 Days Project, Dairy Free, Desert, Gluten Free, Raw, Recipes, Vegan

Day 48 – Cherry & Dark Chocolate Vegan “Ice Cream”

Day48

I am never going to be stumped for something to serve a Vegan dinner guest for desert again!!

This quick recipe, from Treehugger, makes a rich a creamy “ice cream” like desert that is completely Vegan and uses no dairy substitutes. How does this work? The answer is  . . . BANANAS!!!

It is great to have another recipe that uses those bananas that are just starting to go too brown and are not so nice for eating anymore. Honestly, there is only so much banana bread a girl can eat, or give away to friends. To make this recipe all you need is bananas, a blender, and about 5 minutes of time. The secret is popping the bananas in the freezer beforehand. Unlike other fruit there is more sugar in bananas than water, so when you freeze them and then put them in a blender they do not break apart and go slushy. Instead, they stick together and turn into a rich creamy mixture not all that dissimilar from ice cream. Once you have the base mixture of blended banana, you can pretty much add any ingredients you want to make your personal ice cream flavor. All sorts of frozen fruit combinations would work here or you can use fresh fruit, but then have to pop in back in the freezer for a bit before eating. Also, nuts or chocolate never go amiss in ice cream.  I chose cherry and dark chocolate, but hey . . . get crazy . . . experiment a little . . . and have fun.

Cherry & Dark Chocolate Vegan “Ice Cream”

Adapted from: Treehugger

INGREDIENTS

  • 4 browning bananas, chopped into 40 mm or 1 inch pieces and frozen
  • 680 grams or 24 ounces cherries fresh or bottled/canned with juice
  • 125 grams or 4 1/2 ounces of chocolate chips

Make sure you peel and chop up the banana into pieces before you put it in the freezer. I did not originally do this, and could not peel my frozen bananas.

Place the frozen banana pieces and your chosen fruits into your blender and pulse. This will help break up the larger chunk of frozen banana to make it easier for your blender to process. Once you have pulsed a few times, blend the banana and fruit into a creamy puree, add more juice for extra flavor.  Mix in any toppings like chocolate chips or chopped nuts.

Your mixture should be the consistency of ice cream, and can be eaten right away.  If it is too liquid from juice or melting, pop it back into the freezer for a few minutes to harden up.

ENJOY!!

Advertisement
Standard
100 Days Project, Dairy Free, Desert, Gluten Free, Recipes, Uncategorized, Vegan (with substitutions)

Day 45 – Baked Apples Stuffed with Candied Ginger and Almonds

Day45

Baked apples make me think of Grandma and Grandpa Mills . . .

Growing up, we had dinner with my grandparents every Sunday. There was a cafeteria style restaurant they liked to go to, and everyone’s favorite from the desert bar was the baked apple. Those baked apples were not nearly as fancy as this Baked Apple Stuffed with Candied Ginger and Almonds recipe from Jerry James Stone and Treehugger’s Green Wine Guide, but it still makes those memories float to the surface.

I had a friend over last night for a Sunday night game of intense competitive Scrabble, which was a game I always played with with my Grandmother as well. Maybe that is why this recipe seemed like the perfect fit. Unfortunately, I got a bit distracted when reducing the syrup and it turned into more of a caramel that almost candied the baked apples, but it was still quite delicious, and I supplemented it with warm maple syrup to make sure the apple was not too dry.

I served the the baked apples with maple walnut ice cream and a small glass of port. The three made quite a good winter desert combination and an excellent Scrabble treat!!

You can easily substitute the honey for another unrefined sweetener for Vegan alternative . . .

Baked Apples Stuffed with Candied Ginger and Almonds

MAKES: 4- 6 Apples, depending on the size of your apples

INGREDIENTS

  • 4- 6 large apples (Rome or Braeburn)
  • 1/3 cup candied ginger, chopped
  • 3/4 cup almonds, toasted and chopped
  • 1/4 cup brown sugar, packed
  • 1/2 teaspoon vanilla extract
  • 2 tablespoons honey
  • 1 1/2 teaspoons lemon zest
  • 1 teaspoon cinnamon
  • 1/2 teaspoon ground clove
  • Water, for the baking dish

Preheat oven to 350 degrees.

Combine brown sugar, vanilla and honey and mix well. Then mix in the ginger, almonds, cinnamon, clove and lemon zest, and set to one side.

Core each apple; be careful to remove all of the stem and seeds. If need be, trim the apple bottoms so that they sit steadily on a flat surface. Place the apples upright in a baking dish, and spoon the filling into hollow of each apple .

Fill the baking dish with enough water to form a 20 mm or 1/2-inch pool around the apples.

Bake for 1 hour and 15 minutes or until the apples are tender.

Transfer the apples to a serving plate with a spatula.

Pour the reaming liquid from the baking dish into a small saucepan, and cook over a medium-high heat until it becomes syrupy, about 15 minutes. This is where you need to make sure not to reduce it too long that it becomes a caramel. Drizzle the syrup over the top of each apple, and sprinkle some additional almonds and candied ginger on top.

ENJOY!!

Standard
100 Days Project, Baking, Breads, Cakes, Desert, Recipes, Uncategorized

Day 39 – Peanut Butter Banana Bread

Day39

There is a Facebook group called Baking Our Blues Away, that has declared Monday July 15th , 2013 as an international day of baking goodwill.

The idea is simple . . .  “everyone is encouraged to take a moment and give someone they know or don’t know, be it a loved one, a work colleague or perhaps a stranger on the street, a bit of baked or handmade love.”  I have browning bananas in my fruit bowl just asking to be made into banana bread, and so in honor of this, today I am baking this Peanut Butter Banana Bread recipe, which I found on the Sweet Pea’s Kitchen blog but originally comes from Cooking Light magazine.

PicsI can not imagine a better combination than peanut butter and banana. Being an American, I grew up on peanut butter, but I know most Kiwis are brought up on and are more partial to Vegemite or Marmite (for the uninitiated they are very different things and you must have a preference for one or the other).  Sadly, When I moved to New Zealand could not find anything on the grocery store shelves that tasted remotely like I expected peanut butter to taste like. They were all too sweet and sugary with chemical artificial sweeteners, and you could not taste any real peanut in them. Thank goodness for Pics Peanut Butter!!! I only discovered this peanut butter, made in the Nelson region, after being here for over 2 years. It used to only be sold at the Nelson weekend markets, and I was visiting a friend who had moved down the line. Honestly for the last 4 years, Pics has been the only peanut butter I will buy, and until someone can convince me there is another acceptable alternative, I will continue to be forever grateful to Mr. Pic.

So even though it is no longer July 15th, try baking something to share with others. In my experience from this 100 Days Project, where I have been sharing most of what I have been making, it makes you feel good and brings a smile to someone else’s face.

Peanut Butter Banana Bread

adapted from: Sweet Pea’s Kitchen and Cooking Light

INGREDIENTS

For the Bread:

  • 1 1/2 cups mashed ripe banana
  • 1/3 cup plain yogurt
  • 1/3 cup peanut butter, creamy or crunchy depending on your preference
  • 3 tablespoons unsalted butter, melted
  • 2 large eggs
  • 1/2 cup granulated sugar
  • 1/2 cup packed brown sugar
  • 1 1/2 cups all-purpose flour
  • 1/4 cup ground flaxseed or ground almonds
  • 3/4 teaspoon baking soda
  • 1/2 teaspoon salt
  • 1/2 teaspoon ground cinnamon
  • 1/8 teaspoon ground allspice
  • 2 tablespoons chopped dry-roasted peanuts

For the Peanut Butter Glaze:

  • 1/3 cup powdered sugar
  • 1 tablespoon milk
  • 1 tablespoon creamy peanut butter

Preheat oven to 180 C or 350 F.
Grease bottom and sides of a loaf pan and dust with flour.

In a large bowl , beat together the bananas, yogurt, peanut butter, butter and eggs at medium speed until combined. Add sugars and beat until blended.

In a small bowl, whisk together flour, flaxseed/ground almond, baking soda, salt, cinnamon and allspice. Add the dry ingredients to banana mixture; beat just until blended. Stir in nuts, and then scrape batter into prepared loaf pan and smooth surface with a rubber spatula.

Bake until top is golden and toothpick inserted into center comes out clean, about 1 hour 15 minutes. Cool in pan 10 minutes, then transfer to wire rack and cool completely.

To make the peanut butter glaze: In a small bowl whisk together powdered sugar, milk and peanut butter until smooth. Drizzle glaze over bread. Make sure it is completely cool when you do this, or you will wind up with a runny mess, like I did on my first attempt.

ENJOY!!

Standard
Desert, Dips, Condiments and Dressings, Gluten Free, Recipes, Vegan (with substitutions)

Spiced Fruit Compote

Compote

So . . . I was having a discussion this week with a friend about ways to use up large amounts of apples that need eating, and she suggested an apple compote with cardamom, cloves, and ginger.

I was planning on making the Ricotta Stuffed Kumara Pancakes from my Day 24 post for Sunday brunch, and this seemed like the perfect thing to give this already decadent recipe that extra little something special. I used apples, dried apricots, and dried cranberries, but you can pretty much use any fresh and dried fruit combination that takes your fancy.

Making fruit compotes like this is more about adding a dash of this and sprinkle of that rather than an exact science; so the measurements below are approximations. Use your own discretion and tastes to make the recipe perfect for you.

Although I used butter, simply replace it with Olivani or your favorite non-dairy butter like substance, to make this a vegan treat.

Spiced Fruit Compote

INGREDIENTS

  • 4 small apples, chopped
  • 3/4 cup dried apricots, roughly chopped
  • 1/2 cup dried cranberries
  • 2 – 3 tablespoons butter
  • 1/4 cup brown sugar
  • 1 teaspoon ground cinnamon
  • 1 teaspoon fresh ginger, grated
  • 3 – 5 cloves
  • 3 – 5 whole cardamom pods
  • 1/4 cup water

Place the fruit, butter, brown sugar, and spices into a saucepan over a medium heat. Cover the pot, and let the fruit cook down into the the butter and sugar liquid and start to caramelize.

Let fruit cook for 15 – 20 minutes stirring occasionally so that nothing starts to stick to the bottom of the pan. Keep a watch and if there does not seem to be enough liquid add water a little bit at a time. If you like your compote more saucy use more water, if you like it more chunky than use less. You may or may not use the whole 1/4 cup of water.

Taste the compote during the cooking time and adjust spices to your personal tastes.

Before serving, remove the cloves and cardamom pods.

ENJOY!!

Standard
100 Days Project, Baking, Cookies, Desert, Recipes

Day 12 – Snickerdoodle Cookies

Day12

Who wants a late night snack?

I actually really love baking at night. It is a fun and relaxing way to spend an evening. Plus, when finished, you have a sweet treat to go with a bedtime cup of tea, and something yummy to look forward to eating and sharing the next day (or even take over to a friend’s house for a late night cookie delivery).

Snickerdoodles are a cinnamon and sugar shortbread American classic.  If I remember correctly, they are one of the first things I ever learned for to bake myself. Although I probably have not made them is close to 20 years,  I was recently reminded of how much I enjoy Snickerdoodles when Moustache (the cookie bar in Auckland CBD) opened last year, and they had them on offer. So . . . I decided to look up a recipe for Snickerdoodles and added it to my must make soon recipe folder on my computer that I am trying to work my way through during this 100 Days Project challenge.

For the sake of this posting and pure curiosity, I tried looking up where the name Snickerdoodle came from. The best answer of course came from Wikipedia: ” The Joy of Cooking claims that Snickerdoodles are probably German in origin, and that the name is a corruption of the German word Schneckennudeln (snail noodles), a kind of pastry.  It is also possible that the name is simply a nonsense word with no particular meaning, originating from a New England tradition of whimsical cookie names.”  Personally, I prefer the second explanation.

Snickerdoodle Cookies

by: Baking Makes Things Better

INGREDIENTS

Cookies:

  • 2 ¾ cups all purpose flour
  • ½ teaspoon salt
  • 2 teaspoons baking powder
  • 1 cup unsalted butter, room temperature
  • 1 ½ cups granulated white sugar
  • 2 large eggs
  • 1 teaspoon pure vanilla

Coating:

  • ⅓ cup granulated white sugar
  • 2 teaspoons ground cinnamon

Preheat oven to 190°C and place rack in the center of the oven. Line two baking sheets with
parchment paper.

In a large bowl whisk together the flour, salt, and baking powder.

In the bowl of your electric mixer, with a hand mixer, or with a good ‘ol fashioned wooden spoon, beat the butter and sugar until smooth

Add the eggs, one at a time, beating well after each addition. Scrape down the sides of the bowl, and then add in the vanilla extract.

Add the butter/sugar mixture and the flour mixture together and beat until you have a smooth dough. If the dough is soft, cover and
refrigerate until firm.

Shape the dough into 2.5 cm or 1.5 inch round balls.

To coat:

In a large shallow bowl mix together the sugar and cinnamon. Roll the balls of dough in the cinnamon sugar and place on the prepared pan, spacing about 5 cm
apart. Then, using the bottom of a glass, gently flatten each cookie to about 1.5 cm thick.

Bake the cookies for about 10 – 15 minutes, or until they are light golden brown and firm around the edges. The centres of the cookies will still be a little soft. Remove from oven and place on a wire rack to cool.

ENJOY!!

Standard
100 Days Project, Desert, Gluten Free, Recipes, Vegan (with substitutions)

Day 3 – When All Else Fails . . . Make Snickers Truffles

Photo1(17)

So . . . do you remember from my Day 2 post that I had a lot trouble getting the Snickers Bars out of my glass baking dish?

This left me with a rather large amount of broken bits, pieces, chunks that were falling part, and gooey caramel.  Probably close to half the dish wound up being unusable. I hate wasting food; I REALLY hate wasting food . . . especially something that I had put so much time and effort into making. Now those of you that know me, know I am a bit of an insomniac especially when I have something on my mind. I lay awake last night thinking about what, if anything, I could do with this rather yummy mess, and then it came to me  . . . TRUFFLES!!

Day3_3I am not talking about the mushroom kind; I am talking about the yummy, soft, chocolatey little round balls of goodness. I have never made any sort of truffle before, but figured it was worth trying to turn this chocolate, caramel, peanut, nougat mess into some sort of Snickers Truffles. Using my food processor attachment of my stick blender I pulsed the mixture until the larger bits looked broken down but still chunky (I did not want to completely blend it all together as I hoped the different textures of the original Snickers bar layers would still come through). I wet my hands slightly with cold water and rolled a small ping pong ball sized portion of the mixture into as round a shape as I could make it. The caramel was sticky enough that it held everything together, but in the current state they did not look too appetising. There will still some roasted, salted peanuts left from making the Snickers bars the day before. So I quickly pulsed those in the blender into a coarse grind, and then rolled the caramel ball in the peanuts to give it a textured, more appealing finish. VIOLA!!! . . . the Snickers Truffle was born!!

This just goes to show, that when things do not go quite according to plan in the kitchen, do not get upset or feel like you have failed . . . GET CREATIVE!!

I realize this is not officially a new recipe, because the recipe for these truffles would be the same as the for the Snickers Bars, but it is making something I have never made before, so I think it still counts.

Now all that is left to do is to see which people like more . . . the Snickers Bar or the Snickers Truffle.

ENJOY!!

Standard
100 Days Project, Desert, Gluten Free, Recipes, Vegan (with substitutions)

Day 2 – Make Your Own Snickers Bars

day2 v2

Well we are onto Day 2 of the 100 Days Project and I decided that since last night recipes were all savory, we needed desert!!

Now I adore Snickers bars!!  I honestly do not think I would have gotten through University without them. Running between classrooms, labs, and my on campus jobs, Snickers were my first choice from the vending machines from which I all too often ate my meals.  I think I rationalised that because they had peanuts, they probably had the most protein and nutrients to keep me going through the day. Hmmm . . .

Imagine my delight at finding a recipe online, from How Sweet It Is, for making your own version of a Snickers bar . . . and it was definitely one of the recipes on the top of my list for attempting during the 100 Days Project challenge.

I figured it was not going to be easy, but was somewhat dismayed when going over the ingredients list to find multiple items that are not readily available in New Zealand: Marshmallow Fluff and pre-packaged creme caramels. Now if you are willing to go for a 20min drive and pay inflated prices, you can probably get these items as well as many other American food goodies from Martha’s Backyard, the American store in the Auckland suburb of Mt. Wellington (Yes, some of you Yanks might find this hard to believe, but there actually is such a thing as an American store).  I have to admit there have been times I have been craving some particular thing (usually Cool Ranch Doritos) that I make the trek out there and would be willing to pay whatever they are charging for that item, but the main sticking point this time is commercially made Marshmallow Fluff, like most marshmallows, is not vegetarian since it has gelatine. In keeping with the DIY tradition of my adopted Kiwi home, I figured why not try to make both the marshmallow and the caramel myself. It would take quite a bit more effort and time, but what else is a Saturday afternoon for, than attempting to make a delicious treat.

Marshmallow Fluff, made from the Angel food Vegan Marshmallow Mix

Marshmallow Fluff, made from the Angel food Vegan Marshmallow Mix

Marshmallow is something I have not had in close to 20 years and I remember them being quite yummy, which is why luckily I recently picked up a packet of Angel Food Vegan Marshmallow Mix from the SAFE shop in St. Kevin’s Arcade figuring I would find something to do with it. It turns out that Snickers bars was that something. Now I do not normally make things from packets, but vegan marshmallow is something I realistically have no idea how to even start making.  Inside the packet were two sachets clearly marked A and B and easy to follow step by step directions. The biggest obstacle is that you need a candy thermometer to know when the sugar syrup has gotten up to temperature, but I was able to borrow one from a friend who lives close by. The marshmallow fluff created by this packet tasted exactly like I remember marshmallows are supposed to taste. It brought back memories of peanut butter and fluff sandwiches or just digging in with a spoon for a quick after school sugar fix. Fluff was not something my parents allowed around the house often, but it was always a treat. There was more than enough to use for this recipe and have some leftover to form into traditional marshmallow shapes for munching and potential use in another recipe later next week; are you intrigued?

caramel

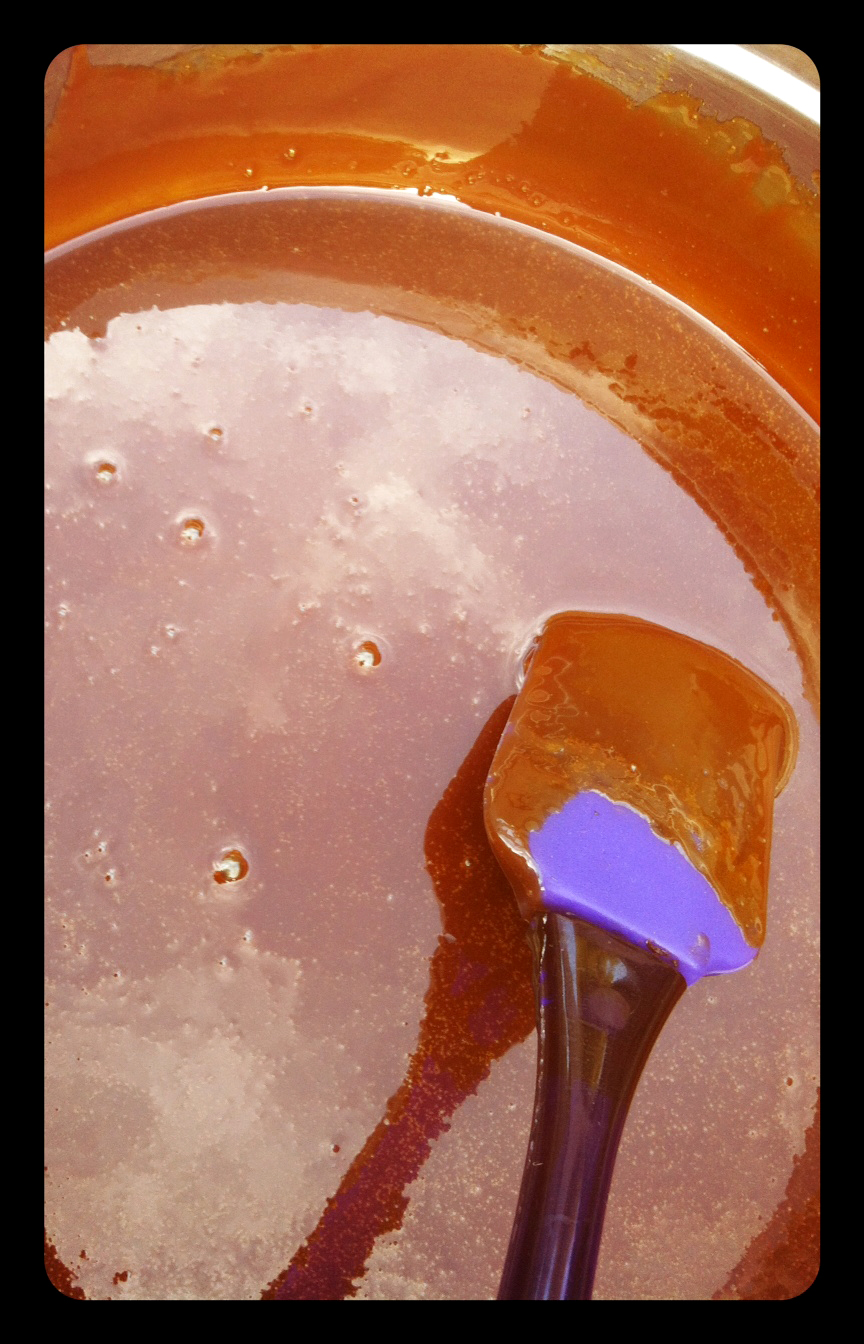
My very large pan full of caramel

As for the creme caramels, I had always seen contestants on Masterchef making their own caramel so I figured it could not be that hard, right? I did a bit of a Google search and came across this page by pastry chef David Lebovitz, which seemed to outline the process of making a dry caramel quite clearly. I followed the steps and succeeded in making a lovely brown caramel. Now the recipe says to melt the store bought creme caramels and add 1/4 cup of heavy whipping cream, which David Lebovitz’s blog also talks about using cream to “stop” the caramel, which means stop it from fully hardening. So I added my 1/4 cup of cream, mixed it through, and set the pan aside while working on another task for the recipe. YIKES!! When I came back to the pan, I saw that the caramel had completely hardened in the pan into a rock solid, smooth as glass sheet. Only too late did I realize that the store bought creme caramels would already have cream mixed through them, and the additional 1/4 cup was only to smooth out the texture further. I spent the next hour or so, gently reheating (you do not want to do this too quickly as the caramel can easily burn) the caramel mixture so that I could add more cream and achieve the correct consistency. In the end I wound up with a very large amount of lovely, incredibly rich caramel  . . . Phew!! If anyone needs caramel for anything, just let me know; I have PLENTY left over.

Make Your Own Snickers Bars

INGREDIENTS:

bottom chocolate layer

  • 1 1/4 cups milk chocolate chips (I used dark chocolate out of personal preference)
  • 1/4 cup peanut butter

Thoroughly grease your baking pan or put down a layer of wax paper. Melt ingredients together in a saucepan, double boiler or microwave, then pour into the baking dish and spread until even. Let cool and harden completely.

nougat layer

  • 1/4 cup unsalted butter
  • 1 cup granulated sugar
  • 1/4 cup evaporated milk
  • 1 1/2 cups vegetarian/vegan marshmallow fluff
  • 1 1/2 cup salted peanuts chopped, roughly chopped
  • 1 tsp vanilla extract

Melt butter in a saucepan over medium heat. Add in sugar and milk, stirring until dissolved and bring to a boil. Let cook for 5 minutes, stirring occasionally. Add in fluff, and vanilla, stirring until smooth. Turn off heat and fold in peanuts, then pour over bottom chocolate layer. Let cool completely. I wanting to make this recipe Vegan, you can substitute the butter for a non-dairy alternative like Olivani, and you can buy a soy evaporated milk and the Angel Food Vegan Marshmallow Mix from the SAFE store in st Kevin’s arcade.

caramel layer

  • 1 cup sugar
  • 250 g heavy cream

Follow the technique for making a dry caramel found on David Lebovitz’s page. Once your caramel mixture is glossy turn down the heat and stir in the heavy cream to “stop” the caramel. This may bubble a little but that is OK, keep on stirring until the heavy cream is well combined and the caramel is smooth. Keep a glass of ice water nearby and drop a small amount on caramel into the water to see if it will completely harden or keep its gooey texture. If hardens too much, add more cream, if does not harden enough, add more sugar. Pour over nougat layer and let cool completely. For a Vegan alternative you can buy soy caramel from the SAFE Store in St. Kevins arcade.

top chocolate layer

  • 1 1/4 cups milk chocolate chips (I used dark chocolate out of personal preference)
  • 1/4 cup peanut butter

Melt ingredients together in a saucepan or microwave, then pour over caramel and spread until even. Let cool and harden completely. Refrigerate for at least one hour before serving, then cut as desired. These can stay at room temperature, but they may get gooey.

While I can not say this is the most successful recipe I have ever made, I learned a lot about many different processes. I succeeded in making Vegan marshmallow (which I will definitely be doing again) and my own caramel. Both of which I have never done before . . . YAY!!  The above recipe is my version, which I hope clarifies the steps and means making this will be much easier for the next person, than it was for me.  My only further suggestions would be to make sure you do each step in the order they are listed, as trying to jump around and do multiple steps at once caused more problems then it saved time.

Also you may want to use either a tin foil disposable tray or silicone baking dish for this recipe, as I had a lot of trouble actually getting the finished Snickers bars out of my glass baking dish.  If you are going to use a glass dish line it with wax paper, which will help the finished product come out (I forgot to do this).

These come out incredibly rich . . . I would recommend cutting into small pieces, and serving with a cup of tea or warm milk.

 ENJOY!!

Standard