I have a question for you Herbivores . . . Do you have the problem of always making just way too much food?
This is certainly a problem in my kitchen; you would think a small army was coming to dinner. I am single, live with one flatmate who I rarely see, every once and awhile I will have a friend or two over for dinner, but typically there is more food made than can possibly be eaten. Realistically, there are only so many days you can stand to eat the same left overs, and while freezing food is an option, my freezer is small and can only hold so much. Plus, not everything freezes well. One of the lovely things about this recipe is that it makes small portions. It serves two, so you have enough for dinner and lunch for the next day. That being said, it is also easibly scalable just in case that small army turns up unexpectedly, or you want to make a healthy meal for your family or friends.
Quinoa (pronounced keen-wah) is becoming a very popular grain in our modern society, but it has ancient origins dating back to Ican civilization. It was considered the “mother or all grains”, and today we call it a “super grain” as it is wheat-free, gluten-free, easy to digest, high in protein, and among the least allergenic foods available. It has been a staple of the indigenous diet in areas like Peru for centuries cultivated more for domestic use than international export. The only problem with Quinoa’s blossoming popularity in the western world is that it is putting pressure on the available crops causing the price to increase, making this staple food economically out of reach for some communities who have depended on it. This imbalance will hopefully be solved as more crops are currently being planted to keep up with both the domestic and international demand.
I can create amazingly complicated recipes, but the simplest of foods can sometimes be a challenge. Qunioa, like rice, can be difficult to cook properly, coming out gluggy when it should be soft and fluffy, or burning to the bottom of your pan if left too long. Just like rice, I have found you can cheat by making it in a rice cooker for perfect results every time. Shhh . . . this can be our little kitchen secret.
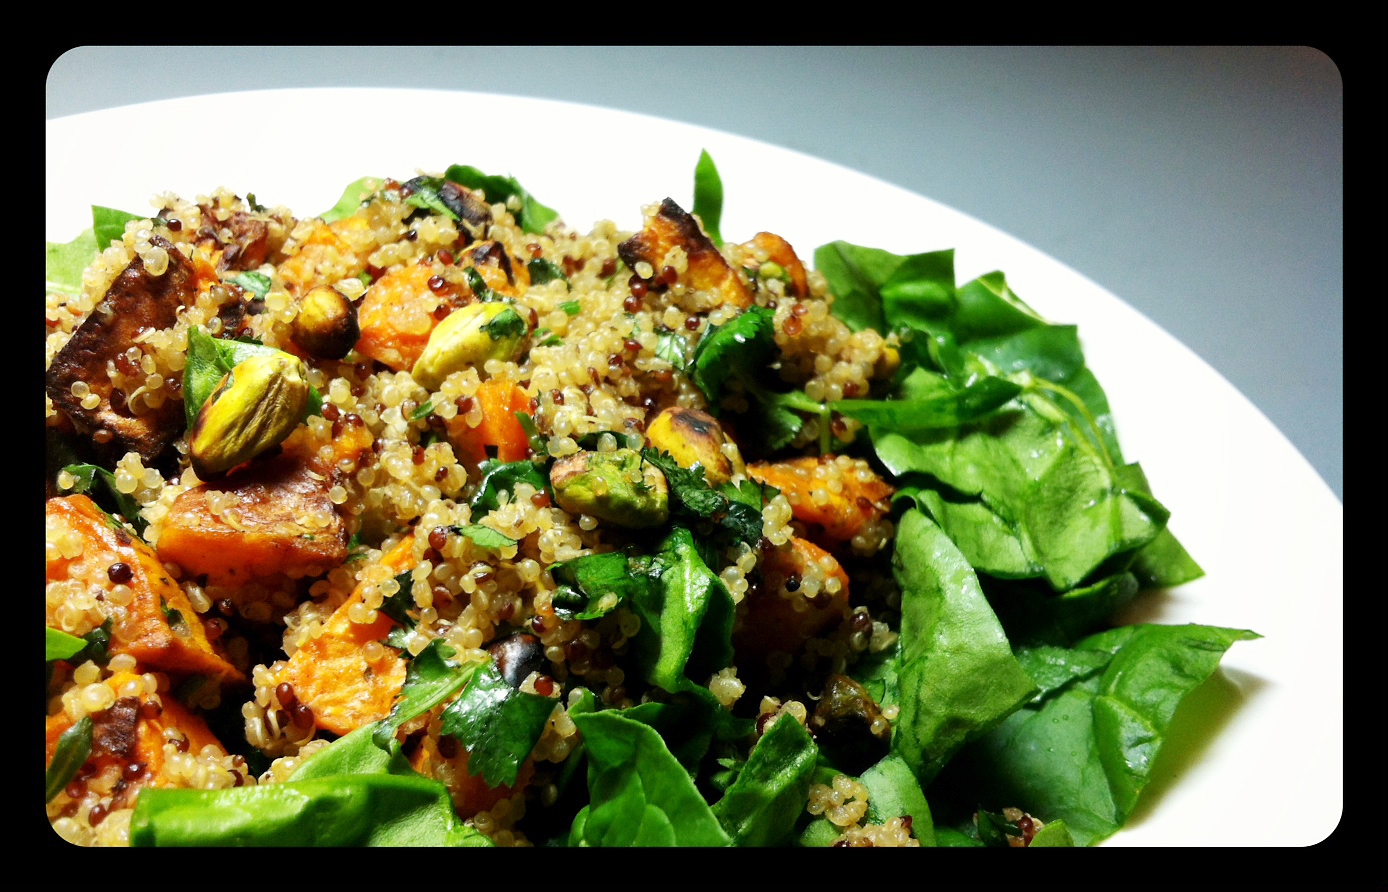
Sweet Potato & Pistachio Quinoa Salad
adapted from: Will Cook For Friends
SERVES: 2
INGREDIENTS
- 1 sweet potato, peeled and cut into 20mm cubes (in New Zealand you can substitute a golden kumara for sweet potato)
- 2-3 tabkespoons olive oil
- 1 clove garlic, minced
- 1/2 cup quinoa, rinsed (I used a mixture of red and white quinoa)
- 1 cup vegetable stock or water
- 1/2 teaspoon coriander seads
- 1/2 teaspoon cumin powder
- 1/4 cup fresh cilantro, chopped
- 1/2 cup pistachios, roasted/salted/shelled, roughly chopped (plus more for garnish)
- 500g of spinach, roughly chopped or baby spinach
- Salt, pepper, and cayenne to taste
Preheat oven to 375f.
Toss cubed sweet potato or kumara with 1-2 tablespoons olive oil, and a large pinch of salt. Spread in an single layer on a foil covered baking sheet, and roast for 15-20 minutes, or until fork tender and brown. Shake or stir the pan once during cooking to stop tops from burning.
In a small pan over medium-high heat dry roast the coriander seeds until they start making a popping sound and release their fragrant aroma. Keep an eye on them, because they can very quickly got from brown to burnt. Grind the coriander seeds into coarse powder in an electric coffee mill, mortar and pestle, or with the bottom of a heavy glass.
In the same small pan, over medium heat, saute garlic in 1 tablespoon olive oil until golden and fragrant.
Rinse the quinoa under cold water, drain, then add to the pan. Add the vegetable broth, coriander, and cumin, and bring to a boil. Cover, reduce the heat to low, and let cook 12-15 minutes without lifting the lid. Remove from heat, and let stand for another 5 minutes. Alternatively, you can add all of these ingredients to a insert of a rice cooker and let it simmer away till done. Remove the lid or your pan or rice cooker, and fluff quinoa with a fork.
Gently stir in chopped cilantro, pistachios, and the sweet potato. Season to taste with salt, pepper, and cayenne.
Place a good size handful of the chopped spinach on a plate and top with the quinoa mixture.
ENJOY!!