100 Days Project, Baking, Breads, Dairy Free, Gluten Free, Vegan (with substitutions)

Day 31 – The Gluten Free Bagel Experiment

day31

Today was Bagel Day at my flat . . .

Since moving to New Zealand 7 years ago, I started making my own bagels and sharing them with friends because it is almost impossible to find a decent bagel in this country, but my gluten-free friends have always had to miss out on Bagel Day.  So . . . This time I decided to try and make gluten free bagels, as well as gluten-full bagels for Bagel Day.

Doing research online, I came up with quite a few gluten free bread recipes that I thought might make a decent bagel. The recipe I decided to go with was a gluten free pizza dough recipe from Karina: The Gluten Free Goddess. My thought process being that pizza crust should have the closest consistency to bagels.

Now proper American, New York style bagels are boiled, and then baked, which is what gives you that lovely crunchy shell around the soft inner bagel. Unfortunately most gluten free bread doughs are more like muffin or cake batter than they are typical bread dough. I knew the dough would not have enough elasticity to hold the bagel shape on its own, and unfortunately I definitely would not be able to boil them.  I came up with the solution of using a doughnut pan to create the round bagel shape with the gluten free dough. I also used the fan bake function of my oven, which will cook the outside quicker than the inside giving you a crispier outer shell to your gluten free bagels.

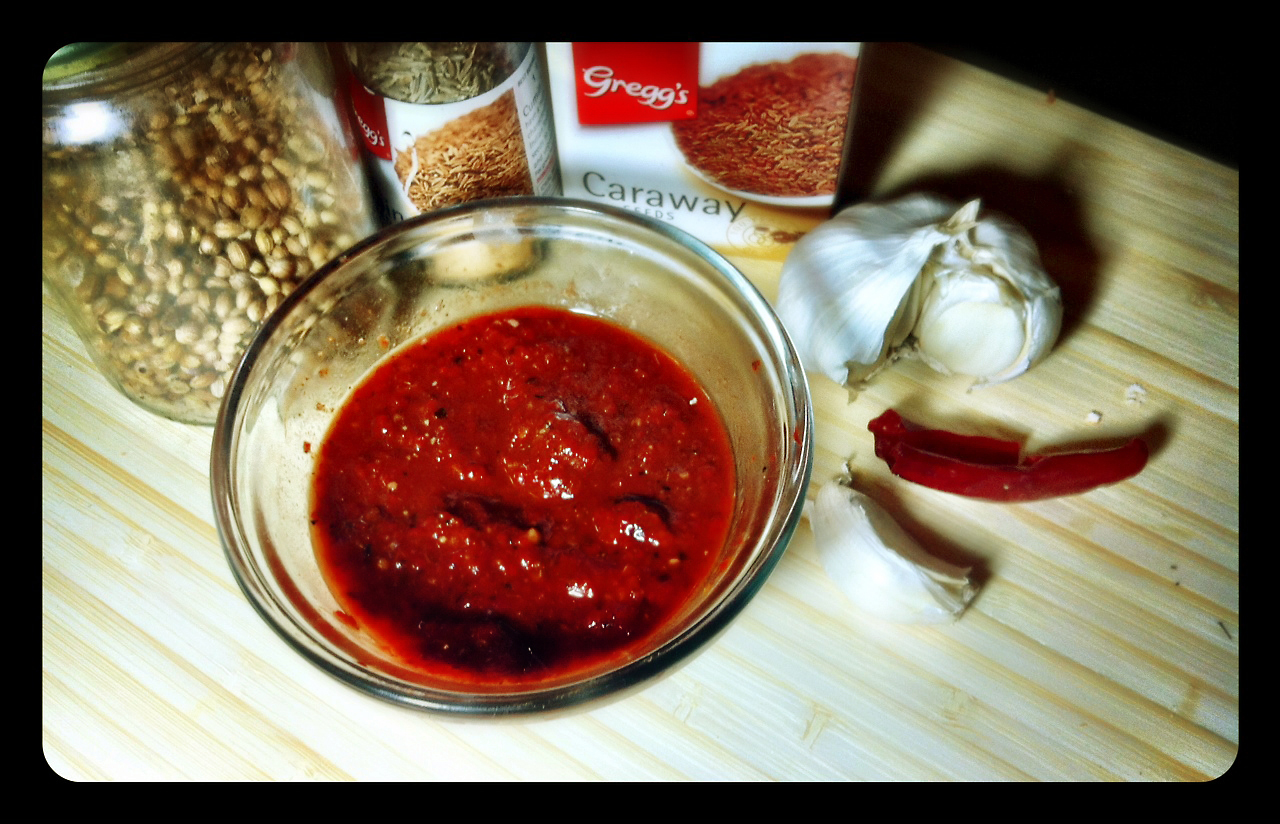
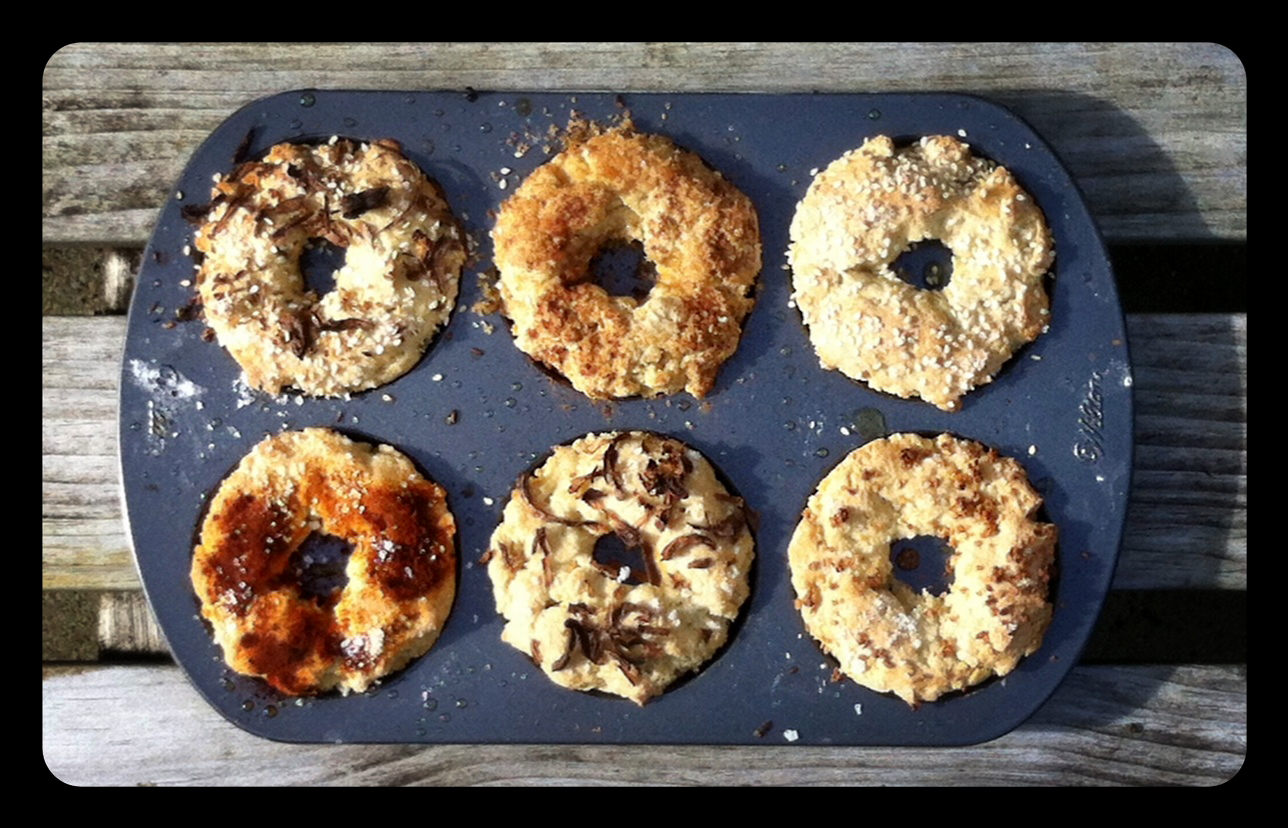
The most important part of any bagel making is the toppings. This is also the fun part where you can get a bit creative. From right to left in the picture above I used garlic and onion and sesame, cinnamon and sugar, sesame and sea salt, smoked paprika and sea salt (my favorite), onion and caraway seeds, and garlic and sea salt. If you think something might taste good on a bagel  . . . give it a try!!

Overall, these were not quite the same texture as normal bagels, but they were quite yummy and I think the idea is worth further experimentation.  My gluten free friends certainly seemed quite happy tucking into their bagel-like treats.

This recipe can easily be made vegan by using an egg replacer.

If you are not concerned about gluten . . . click here for my New York Style Bagel recipe.

Gluten Free Bagels

adapted from: The Gluten Free Goddess

MAKES: 12 bagels

INGREDIENTS

  • 2 cups tapioca flour/starch
  • 1 cup sorghum flour
  • 1/2 cup brown rice flour
  • 1/2 cup GF millet flour
  • 3 teaspoons baking powder
  • 2 teaspoons xantham gum
  • 1 teaspoon fine sea salt
  • 3 tablespoons organic light brown sugar
  • 1 1/4 cup warm water (between 110 – 115ºF)
  • 1 teaspoon organic light brown sugar
  • 1 packet active dry yeast
  • 1/4 cup good olive oil
  • 1/4 cup beaten organic free-range egg whites
  • 1/4 teaspoon light tasting rice vinegar

Preheat the oven to 400 F or 200 C, using the fan bake setting if you have one.

Brush the pockets of the doughnut pan with olive oil and set aside.

In a large mixing bowl, whisk together the flours and dry ingredients.

Proof the yeast in 1 cup warm water with a pinch of sugar. Once the yeast has gotten puffy, add the proofed yeast to the dry ingredients.

Add the oil, eggs and vinegar, and beat the dough until smooth and sticky. The dough should be more like cake or muffin batter than typical bread dough.

Spoon the dough into the pockets of the doughnut pan. Wet your fingers with warm water, and smooth the surface of the bagels.  Then set the pan in a warm spot to rest and rise a bit- about 15 minutes.

Brush the tops of the bagels with olive oil, and add you choice of yummy toppings.

Bake for 10 – 15 minutes till golden.

Eating while still warm, preferably slathered with cream cheese, is always best.

ENJOY!!

Standard
100 Days Project, Dairy Free, Gluten Free, Recipes, Soups, Vegan

Day 30 – Carrot, Ginger, & Miso Soup

day30

Carrots again !?! You might ask . . .

Yes, carrots again . . . this is what happens when you buy a big bag of any ingredient. Obviously, things are less expensive when you buy them in bulk, and if you want to be sustainable in your cooking, then it does not pay to let the extras go to waste. Soups are a great way to use up large amounts of vegetables that need cooking.

This recipe for Carrot, Ginger & Miso Soup, from Dish magazine, combines the carrots with traditionally Japanese flavors. Miso is a Japanese seasoning produced by fermenting rice, barley, soybeans, salt and a particular fungus called kōjikin. The result is a thick paste, that is high is protein and rich in vitamins and minerals, used for sauces, spreads, pickling vegetables or meats, and mixing with soup stock. Miso played an important nutritional role in feudal Japan, and is still widely used, both in traditional and modern Japanese cooking. Typically, miso is salty, but its flavor and aroma depend on various factors in the ingredients and fermentation process. There is a wide variety of miso available, and different varieties of miso can be described as salty, sweet, earthy, fruity, and savory. I tend to always keep Miso in the fridge, as miso soup makes a great quick meal, and it can be used to add flavor and protein into many dishes, both in Japanese cuisine and more western modern vegetarian cooking.

Just a quick tip . . . if you have left over fresh ginger, pop it into the freezer. Once frozen it will last for months, and when used in cooking the frozen ginger thaws and has the same robust flavor as when it was fresh. This trick can also be used for saving chilli peppers.

Carrot, Ginger & Miso Soup

adapted from: Dish Magazine

SERVES: 4-6

INGREDIENTS

  • 1 tablespoon olive oil
  • 1 onion, chopped
  • 4 cloves of garlic, crushed
  • 5 cm or 1 in piece of fresh ginger
  • 1 kg or 2.2 lbs carrots, peeled and chopped
  • 1/4 cup white miso paste
  • 1 litre vegetable stock
  • sea salt and crushed black pepper to taste
  • toasted sesame seeds, spring onions, and sesame oil for garnish

Heat the oil in a large sauce pan over a high heat.

Add the onion, garlic and ginger, and cook for 4-5 minutes, until softened.

Add the carrots and cook for an additional 4-5 minutes.

Add the miso paste and vegetable stock, sprinkle with salt and pepper, and bring to a boil.

Reduce heat to low and simmer for 20 minutes or until carrots are tender.

Blend until smooth, and then divide into bowls for serving.

Garnish with the spring onion, a sprinkle of toasted sesame seeds, and a drizzle of sesame oil.

ENJOY!!

Standard
100 Days Project, Baking, Muffins, Recipes, Uncategorized

Day 29 – Carrot Cake Muffins with Cream Cheese Center

day29

If carrots are good for your eyes, than carrot cake must be even better . . . right!?!

These little Carrot Cake Muffins with Cream Cheese Center, from The Curvy Carrot,  make a yummy breakfast, lunch time treat, or afternoon snack.   They were super quick to put together this morning, and with carrots, raisins, and walnuts, they have to at least be a little bit healthy for you (just ignore all the sugar).

Carrots have been used in sweet cakes since medieval times when sweeteners were scarce and expensive. Carrots, which contain more sugar than any other vegetable besides the sugar beet, were much easier to find and less expensive. Similarly, during World War II, the popularity of carrot cake was revived in Britain because of rationing. Carrot cakes first became commonly available as a novelty item in restaurants and cafeterias in the United States in the early 1960s.  People liked them so much, that soon carrot cake became a standard desert in restaurants.

Carrot Cake Muffins with Cream Cheese Center

adapted from: The Curvy Carrot

MAKES:12

INGREDIENTS

for the filling:

  • one 8-ounce or 250g package cream cheese
  • 1/4 cup granulated sugar
  • 1/4 teaspoon almond extract or vanilla

for the muffins:

  • 2 1/4 cups all-purpose flour
  • 1/2 cup granulated sugar
  • 1/4 cup light brown sugar, firmly packed
  • 1 1/2 teaspoons baking powder
  • 1 1/2 teaspoons ground cinnamon
  • 1 1/2teaspoon ground ginger
  • 3/4 teaspoon salt
  • 2 large eggs
  • 3/4 cup milk
  • 1/3 cup vegetable oil
  • 1 cup grated carrots, lightly packed (about 2 medium carrots)
  • 2/3 cup walnuts, toasted and chopped
  • 2/3 cup raisins, chopped

Preheat the oven to 400 degrees.

Line a cupcake pan with paper liners or brush with melted butter.

For the filling: In a microwave-safe bowl, microwave the cream cheese on low power until softened, about 40 seconds.  Add the granulated sugar and almond extract to the cream cheese mixture, mixing well, and set aside.

For the muffins: In a medium-sized bowl, whisk together the flour, sugars, baking powder, cinnamon, ginger, and salt.

In a separate small bowl, whisk together the eggs, water, and oil. Using a rubber spatula, slowly add the wet ingredients to the dry ingredients and stir until just
combined. Then, fold in the grated carrots, walnuts, and raisins.

Drop about 2 tablespoons of the muffin batter into each muffin cup, making sure to completely cover the bottom.

Using another tablespoon, drop 1 tablespoon of the cream cheese mixture onto the center of each muffin cup.

To complete the muffins, cover each dollop of cream cheese completely with the remaining muffin batter. It is helpful to wet your fingertips a little bit to spread the batter evenly and thoroughly over the tops of each muffin.

Bake the muffins until a cake tester inserted into the center of a muffin comes out clean, about 20 minutes.

Transfer the muffins to a wire rack to cool.

ENJOY!!


Standard
100 Days Project, Dairy Free, Gluten Free (with Substitutions), Mains, Recipes, Uncategorized, Vegan (with substitutions)

Day 28 – Spiced Eggplant with Herbed Bulgur Salad

day28

Since the last two days have been quick and simple recipes, I figured I would do something a bit fancier for today’s post.

Are you ever in a Doctor’s office or coffee shop flipping through the magazines and come across that amazing looking recipe you want to take home to try? So you very sneakily and quietly, trying not to attract the receptionist’s or cafe staff’s attention, rip the recipe out of the magazine and quickly stuff it into whatever bag or purse you have with you. I know I have done this countless times over the years since I have started being interested in cooking as a teenager. It always leaves me feeling a bit guilty . . . but thank goodness for technology and camera phones; I no longer have this guilt. Now I simply pull my iPhone out a take a picture of whatever amazing looking recipe has caught my attention. This recipe for Spiced Eggplant with Herbed Bulgur Salad, found in January 2012 issue of Bon Appetit magazine, is was one of these recipes that I snapped with my iPhone.

Eggplants are a vegetable that is native to the Indian Subcontinent, has been cultivated in southern and eastern Asia, and the first known written record is found in an ancient Chinese agricultural treatise. It is believed that the eggplant was introduced throughout the Mediterranean by the Arabs in the early Middle Ages. The raw flesh of the eggplant can have a somewhat bitter taste, but becomes tender when cooked and develops a rich, complex flavor. Many recipes advise salting, rinsing and draining  eggplants to soften it and to reduce the amount of fat absorbed during cooking, but mainly to remove the bitterness that it can have. The flesh is capable of absorbing large amounts of cooking fats and sauces, making for very rich dishes, but salting reduces the amount of oil absorbed. Due to its texture and bulk, eggplant makes a great  meat substitute in vegan and vegetarian cuisine.

Bulgur is a whole grain, usually sold parboiled and dried, that has a light nutty flavor and is a common ingredient in Armenian, Assyrian, Lebanese, Turkish, Middle Eastern, and Mediterranean dishes.  Bulgur can be used in pilafs, soups, bakery goods, salads, or as stuffing. Its high nutritional value makes it a good substitute for rice or couscous.

I was looking forward to making this dish because of the interesting spice mixture that is brushed on the eggplants before they are roasted, and the combination of sweet, savory, and crunchy ingredients that are mixed through the bulgur salad, and this recipe definitely delivered on the promise of great flavor and spice.

This dish can easily be made dairy free and vegan by leaving off the yogurt, and the bulgur can be substituted with quinoa to make it gluten free.

Spiced Eggplant with Herbed Bulgur Salad

from: Bon Apetit, January 2012

INGREDIENTS

  • 1/2 cup olive oil, divided, plus more for drizzling
  • 2 tablespoons preserved lemon peel, finely chopped
  • 2 garlic cloves, smashed
  • 2 teaspoons ground cumin
  • 1 teaspoon ground coriander
  • 1 teaspoon paprika
  • 3/4 teaspoon ground cinnamon
  • 1/2 teaspoon crushed red pepper flakes
  • 1/2 teaspoon sea salt
  • 2 medium eggplants (9-10 ounces each), halved lengthwise
  • 1 cup quick cooking bulgur
  • 1/2 cup pitted green olives or capers
  • 1/2 small red onion, thinly sliced
  • 1/3 cup currants
  • 1/2 cup flat-leaf parsley, chopped
  • 1/3 cup fresh coriander, chopped, plus more for garnish
  • 1/4 cup pistachios, toasted and lightly crushed
  • 2 tablespoons fresh lemon juice
  • freshly ground black pepper
  • 1 cup Greek style yogurt

Preheat ovem to 350 degrees F or 180 degrees C

In a small bowl, combine 1/4 cup oil, the next seven ingredients, and 1/2 teaspoon salt.

Score the flesh of each eggplant half with 15mmor 1/2 inch deep diagonal crisscrossing lines, spacing 40mm or 1 inch apart (do not cut through the skin). Drizzle 1 tablespoon oil over each cut side, allowing it to soak in. Season lightly with salt. Brush or spoon spice mix on each half diving it equally. Place eggplants, cut side up on a rimmed baking sheet and roast until soft ( about 50 – 60 min).

While eggplant is cooking, place bulgur in a large bowl and cover with 1 1/2 cups boiling water. Let soak for 45 minutes to soften and absorb water. Stir in olives or capers, onion, currants, parsley, 1/2 cup coriander, pistachios, and lemon juice. Season to taste with salt and pepper, and then let sit for at least 30 minutes for flavors to meld.

Serve at room temperature, with a dallop of greek yogurt on top of the bulgur salad and coriander to garnish.

ENJOY!!

Standard
100 Days Project, Recipes, Side Dish, Vegan (with substitutions)

Day 27 – Crumbed Asparagus

day27

Another busy day needs another quick, simple, and yummy recipe . . .

This recipe for Crumbed Asparagus, by The Cozy Herbivore, seemed to be the perfect side dish for the left over Creamy Pearl Barley & Porcini Mushroom Risotto from my Day 25 post. It has lovely flavors of lemon, honey, garlic, and chive added into the freshness of the roast asparagus, and the crunchiness of the panko bread crumb is one of the best parts of the dish.

Asparagus has been eaten as a vegetable and used as a medicine, since ancient times.  It was known in Syria and in Spain, and Greeks and Romans ate it fresh when in season and dried it for eating during the winter.  A recipe for cooking asparagus is in the oldest surviving book of recipes, and the ancient Greek physicians used asparagus as a beneficial herb during the second century AD. By 1469, asparagus was cultivated in French monasteries, and asparagus became available to the New World around 1850.  Because once the buds start to open, the shoots will turn “woody”, only young asparagus shoots tend to be eaten.  Asparagus is low in calories, very low in sodium, and is a good source of many other vitamins and minerals.

I know winter in New Zealand is not asparagus season, so I am being a bit naughty, but this dish was worth the ridiculous amount I paid for the asparagus at the food store.

The recipe can easily be made gluten free by substitutng the bread crumbs for gluten free bread crumbs, and can be made Vegan by substituting the honey for agave nectar or brown rice syrup, and leaving out the parmesan.

Crumbed Asparagus

adapted from: The Cozy Herbivore

MAKES: 2-3 servings

INGREDIENTS

for the asparagus:

  • 1 pound fresh asparagus
  • 1 medium lemon
  • 1 teaspoon honey
  • 1 tablespoon extra-virgin olive oil
  • 1/2 teaspoon dried garlic granules
  • sea salt & freshly cracked pepper, to taste

for the crumb topping:

  • 1 cup bread crumbs
  • 1/4 cup finely shredded parmesan cheese
  • 1 tablespoon finely minced fresh flat-leafed parsley
  • 1 teaspoon finely minced fresh chives
  • 2 tablespoons extra-virgin olive oil
  • sea salt & freshly cracked pepper, to taste

Preheat oven to 400 degrees Fahrenheit.

Trim asparagus spears by snapping off woody ends. The asparagus will break naturally between the fresh stalk and the tough end. Discard the ends.

Juice and zest lemon. Finely mince lemon zest and set aside to use in crumb topping.

In a small bowl whisk together lemon juice, honey, garlic granules and olive oil.  Add a pinch of sea salt & a few cracks of pepper. Taste and adjust seasonings accordingly.

Toss trimmed asparagus spears in lemon juice mixture. Arrange coated spears in a single layer in a casserole dish, and pour remaining lemon juice mixture over.

Bake until just tender, about 10 minutes. They should feel slightly soft and be easily pierced with a fork without being mushy.

While the asparagus is roasting, prepare crumb topping. In a large bowl, combine bread crumbs, cheese, minced herbs, olive oil and 1 teaspoon of the finely minced lemon zest. Using freshly washed hands, toss the mixture together until combined. Add a generous pinch of sea salt & a few cracks of pepper. Taste
and adjust seasonings accordingly.

When asparagus is done roasting, pour bread crumb mixture over and place under the broiler of your oven for one minute, or until browned and toasty. This can very quickly turn from brown to burned so keep a careful watch and do not walk away.

When the crumb has browned, take the baking dish out of the oven and serve,

ENJOY!!

Standard
100 Days Project, Dairy Free, Raw, Recipes, Snacks, Vegan (with substitutions)

Day 26 – No Bake Granola Bars

Photo1(32)

On to Day 26, Herbivores . . .

Today was a busy day, did not have time to grab breakfast, and got home late. These kind of days are where quick snacks come in handy, and quick recipes. I had seen this recipe for easy No Bake Granola Bars on Food52, and figured I would keep it around for one of these short on time days during the 100 Days Project.

All these ingredients are items I normally keep in my pantry, and I think most people will probably have around. I used rolled oats, sunflower seeds, pumpkin seeds, raisins, and dried cranberries, but there are infinite various on this combination. You can easily tailor the recipe to suit your personal tastes. Some other suggestions might be chocolate chips, dried pineapple, cashews, almonds, coconut, or dried cherries, and these granola bars could easily be made gluten free by using puffed millet and other gluten free cereals instead of oats. This recipe can also be made Vegan by substituting the honey with agave nectar or brown rice syrup. Personally I love honey though, I think honey is one of the main reasons I am not Vegan. Well . . . honey and cheese.

No Bake Granola Bars

From: Food52

MAKES:10-12

INGREDIENTS

  • 2 1/2 cups rolled or quick oats
  • 1/2 cup raw pumpkin seeds
  • 1/2 cup raw sunflower seeds
  • 1/2 cup raisins
  • 1/2 cup dried cranberries
  • 2/3 cups peanut or almond butter
  • 2/3 cup honey (adjust based on how well things stick together)
  • 1/8 teaspoon sea salt (adjust based on which nut butter you use)

Mix oats,  seeds, and fruit in a large bowl

I a small bowl, whisk together nut butter, sweetener, and sea salt. I used a half and half combination of Pics Peanut butter and Almond butter, mostly because I did not have enough peanut butter on its own, but also because I thought it would give an interesting taste.  If you are in New Zealand, where it is easier to find solid honey than liquid honey, put the solid honey in the microwave for 30 seconds to loosen it up before trying to whisk it into the peanut butter.
Pour into oat mixture, and mix well, till everything is sticky and combined. If it’s too dry, add a bit more honey.
Press mixture into a shallow baking dish that you’ve lined with foil, saran wrap, or baking paper. Cover with more foil/saran, press well into the baking dish (Iused the bottom on another baking dish for this in order to make sure the pressure was flat and even), and refrigerate for 4 hours.
Cut into bar shapes, wrap, and keep refridgerated till ready to use. They will last two weeks in the fridge.
ENJOY!!
Standard
100 Days Project, Mains, Recipes, Vegan (with substitutions)

Day 25 – Creamy Pearl Barley & Porcini Mushroom Risotto

Day25

Who Hoo . . . it is Day 25, which means I am a quarter of the way through my 100 Days Project challenge.

Do you ever forget you already have an ingredient in the pantry and buy more? I do . . . recently this has happened with pearl barley; I have more pearl barley in my cupboard than anyone person should realistically have. I figured this milestone called for something a little bit fancy, and this recipe for Creamy Pearl Barley & Porcini Mushrrom Risotto, from Treehugger (my favorite green living website), originally caught my eye when I was going through a phase of experimenting with pearl barley recipes. I never got around to making this one so it was a perfect fit for today’s recipe.

Pearl Barley is the most common form of barley used for cooking. It cooks faster and is less chewy than other, less-processed forms of barley. Similar to wheat in its caloric, protein, vitamin and mineral content, pearl barley is cooked mainly in soups and stews. In this case, using barley in a risotto gives the dish a nutty flavor not usually found with risotto rice.

Porcini Mushrooms are a prized ingredient in various foods and cuisines.  Most often dried, these mushrooms keep their flavor after drying, and are then reconstituted and used in cooking.  Low in fat and digestible carbohydrates, and high in protein, vitamins, minerals and dietary fibre, Porcini mushrooms are commonly prepared and eaten in soups, pasta, or risotto.  They are sold commercially,but are very difficult to cultivate making Porcini mushrooms an expensive ingredient, but I figured Day 25 needed to be special.

Thank you Herbivores for sticking with me so far!! I hope you are enjoying the recipes I am sharing with you and they are inspiring you to do some cooking of your own.

Creamy Pearl Barley & Porcini Mushroom Risotto

adapted from: Treehugger

INGREDIENTS

  • 14g dried porcini mushrooms
  • 2 tablespoons unsalted butter (use olive oil for a vegan version)
  • 4 good sized shallots, finely chopped
  • 1/2 teaspoon freshly ground black pepper
  • 1 cup pearl barley
  • 1/2 cup dry white wine (be sure it is vegan, if making the vegan version)
  • 4 cups mushroom or vegetable stock
  • 1/2 cup crumbled fresh soft cheese (skip for vegan version, or use a vegan substitute)
  • 1/4 cup snipped fresh oregano, chives, or other fresh herb of your choice
  • salt to taste

Combine porcini mushrooms with 1 cup hot water in a bowl and set aside for 5 minutes. Then remove mushrooms, squeezing out and reserving soaking liquid.  Rinse and drain the porcini mushrooms, then chop finely. Strain the soaking liquid through a paper towel lined sieve into a medium saucepan. Set aside.

In a large saucepan, melt butter over medium heat. Add the shallots, porcini mushrooms, and pepper. Cook for 5 to 7 minutes, stirring often, until onion is soft but not
browned. Stir in barley until well coated with onion mixture.

Add wine and bring to a boil, stirring until wine has been absorbed. Remember you need to use a wine that tastes nice, because if you use a cheap, bad tasting wine, that flavor will transfer into your dish. Stir in 2 cups stock. Increase heat to high and bring to a boil, and then reduce heat to low and simmer, uncovered and stirring occasionally, for about 20 minutes or until stock has been absorbed and barley has swollen and is starting to soften.

Meanwhile, add remaining stock to mushroom soaking liquid and heat over medium-high heat until steaming. Keep this mixture warm over low heat.  Add the hot stock mixture to barley 1/2 cup at a time, stirring often and allowing barley to absorb stock before adding more, until most of the stock is used and barley is tender but still a little chewy, about 20 minutes. You may not use all of the left over stock.

Stir in the cheese and half of your chosen fresh herb. Season with salt and more pepper to taste. Spoon into shallow bowls and sprinkle with remaining fresh herb.

Pour yourself a glass of the left over wine, and . . .

ENJOY!!

Standard
Desert, Dips, Condiments and Dressings, Gluten Free, Recipes, Vegan (with substitutions)

Spiced Fruit Compote

Compote

So . . . I was having a discussion this week with a friend about ways to use up large amounts of apples that need eating, and she suggested an apple compote with cardamom, cloves, and ginger.

I was planning on making the Ricotta Stuffed Kumara Pancakes from my Day 24 post for Sunday brunch, and this seemed like the perfect thing to give this already decadent recipe that extra little something special. I used apples, dried apricots, and dried cranberries, but you can pretty much use any fresh and dried fruit combination that takes your fancy.

Making fruit compotes like this is more about adding a dash of this and sprinkle of that rather than an exact science; so the measurements below are approximations. Use your own discretion and tastes to make the recipe perfect for you.

Although I used butter, simply replace it with Olivani or your favorite non-dairy butter like substance, to make this a vegan treat.

Spiced Fruit Compote

INGREDIENTS

  • 4 small apples, chopped
  • 3/4 cup dried apricots, roughly chopped
  • 1/2 cup dried cranberries
  • 2 – 3 tablespoons butter
  • 1/4 cup brown sugar
  • 1 teaspoon ground cinnamon
  • 1 teaspoon fresh ginger, grated
  • 3 – 5 cloves
  • 3 – 5 whole cardamom pods
  • 1/4 cup water

Place the fruit, butter, brown sugar, and spices into a saucepan over a medium heat. Cover the pot, and let the fruit cook down into the the butter and sugar liquid and start to caramelize.

Let fruit cook for 15 – 20 minutes stirring occasionally so that nothing starts to stick to the bottom of the pan. Keep a watch and if there does not seem to be enough liquid add water a little bit at a time. If you like your compote more saucy use more water, if you like it more chunky than use less. You may or may not use the whole 1/4 cup of water.

Taste the compote during the cooking time and adjust spices to your personal tastes.

Before serving, remove the cloves and cardamom pods.

ENJOY!!

Standard
100 Days Project, Mains

Day 24 – Ricotta Stuffed Kumara Pancakes with Spiced Fruit Compote

Day24

One recent comment from a Herbivore reader is that everything on the blog is so healthy.

I have to admit I do not eat super healthy all the time; what is the fun in that!?! You have to have that extra fat and calories sometimes, and in my opinion, Sunday brunch is the perfect time to be a bit naughty. With that in mind, may I present my take on Jerry James Stone’s Ricotta Stuffed Sweet Potato Pancakes.

Being in New Zealand, I used orange kumara instead of sweet potato and the fruit compote topping idea came from a dinner time discussion I had with a friend about easy ways to use up apples that need eating. Click here for my Spiced Fruit Compote recipe.

Earlier this week, I was having the discussion about kumara vs sweet potato and if they are the same thing.  Kumara is the Maori name for sweet potato; as far as I can tell they are both from the same plant family, but they are actually a different variation.  Some people claim that kumara are sweeter and more flavorful, and if my memory of sweet potato is correct than kumara does have a slightly different distinct flavor of its own.

The fresh ricotta came from yesterday’s visit to the La Cigale French Market, where a lovely Italian couple sells amazing Mozerella, Scamorza, and Ricotta cheeses that do not contain rennet.  This is an enzyme produced in a cow’s stomach and used in cheese production to coagulate the milk causing it to separate into curds and whey. Many vegetables have enzyme properties that do the same thing, and vegetable rennet is becoming more and more popular in modern cheese production.

These pancakes, fresh squeezed juice, and couple bottles of bubbles made an incredibly decadent boozey brunch. We certainly needed to take a bit of a walk after eating, but it was the perfect chance to enjoy another sunny winter day.

Ricotta Stuffed Kumara Pancakes with Spiced Fruit Compote

adapted from: Jerry James Stone

MAKES: approx. 12 pancakes

INGREDIENTS

  • 1 large orange kumara or sweet potato, peeled
  • 1 ⅓ cups flour
  • 1 ½ cups milk
  • 2 eggs
  • 3 tablespoons brown sugar
  • 2 teaspoons baking powder
  • ½ teaspoon salt
  • ½ cup ricotta
  • warmed maple syrup
  • spiced fruit compote
  • pecans, dry roasted and chopped

Peel the kumara or sweet potato, wrap it in tinfoil and bake it for about an hour at 400 degrees F or 200 degrees C in a pre-heated oven; you want it to be very tender.

Sift the flour, salt and baking powder into a large mixing bowl, and then add the brown sugar.

Crack and separate the two eggs. Whisk the egg yolks and the milk together so they are just combined.

Remove the kumara or sweet potato from the oven when it’s done and puree it either with a ricer, a stick blender,  a potato masher,  a fork, or any other kitchen implement that will get the job done. Add the puree to the dry mixture, mixing it well. It should create what looks like a bright orange smooth dough (made me wonder if it would be good for gnocchi).

Work in the egg and milk mixture, until completely combined. Using a whisk to make sure there are no floury lumps.

Beat the egg whites until they are fluffy and stiff.  Fold the egg whites into the mixture, but do not overly mix it.

In a buttered skillet, over a medium heat, ladle in the sweet potato pancake mixture. When bubbles form on the top and the edges look crispy, flip the cakes.

While these are cooking, whisk the ricotta cheese in a small bowl, giving it a creamier texture and making it easier to spread.

When the pancakes are done, layer them with ricotta and top with maple syrup, spiced fruit compote, and chopped pecans.

ENJOY!!

Standard
Dairy Free, Dips, Condiments and Dressings, Gluten Free, Recipes, Vegan

Harissa

Harissa

Mmmmm . . . Spicy chili goodness!!

Harissa is a spiced chili paste originally from Tunisia, but its use has spread to other North African and Middle Eastern countries . The main ingredients are hot chili peppers and spices and herbs such as garlic paste, coriander, red chili powder, caraway as well as some kind of vegetable or olive oil.  Recipes for harissa vary according to region and country; variations can include the addition of cumin, red peppers, garlic, coriander, and lemon juice. In Saharan regions, they add a smokey flavor to harissa.

I needed a harissa paste to use in my Day 23- Harissa Ravioli post, and a friend suggested that I try making my own. Brilliant idea!! After a bit of research I found a recipe on the Food52 blog site, that seemed to be easy enough, use ingredients I mostly already had around the house, and was open to my own interpretation. You are supposed to let the harissa paste sit for over 24 hours before using, but since I needed it for a particular recipe I could not wait. My version of harissa worked perfectly in the dish, and I cannot wait to taste the intensity of the flavors 24 hours from now.

Harissa

MAKES: approx. 1 1/2 cups

INGREDIENTS

  • 1 teaspoon cumin seeds
  • 1 teaspoon coriander seeds
  • 1/2 teaspoon caraway seeds
  • 1/2 teaspoon smoked paprika
  • 3 garlic cloves
  • 2-3 red jalapeno or serrano chiles, stemmed, chopped with seeds (the more you add, the hotter the harissa)
  • 2 large or 3 medium red bell peppers, roasted, peeled and seeded, coarsely chopped (I actually used jarred roasted red peppers and it worked just as good)
  • Extra-virgin olive oil
  • 1 teaspoon freshly ground black pepper
  • 1/2 teaspoon sea salt, or to taste

Toast cumin, coriander and caraway seeds in a dry skillet over medium heat until aromatic, 1 minute. Transfer to a mortar with pestle, and grind seeds to a fine powder.

Combine ground seeds, garlic, smoked paprika, chiles, red peppers and 1 tablespoon olive oil in bowl of food processor. Process, adding additional olive oil if necessary, for a thick sauce-like consistency. Add ground pepper and salt.

Let harissa sit at least one hour and up to 24 hours before serving. (Refrigerate until use.)

ENJOY!!

Standard