100 Days Project, Dairy Free, Gluten Free, Party Food, Recipes

Day 17 – Dukkah Carrot & Zucchini Bites with Tahini Dressing

Day17

A friend sent me this recipe that she had found on Lady Homemade.

It seems like the perfect Sunday snack or party treat, especially since it fits nicely into the Paleo diet regime that many people seem to be following these days.  First popularized in the mid-1970s by gastroenterologist Walter L. Voegtlin, the Paleo diet is based on the presumed ancient diet of wild plants and animals that our ancestors ate during the Paleolithic era. The contemporary version of this diet consists mainly of fish, grass-fed pasture raised meats, eggs, vegetables, fruit, fungi, roots, and nuts, and excludes grains, legumes, dairy products, refined salt, refined sugar, and processed oils. The idea is based on the premise that modern humans are genetically adapted to the diet of their Paleolithic ancestors and that human genetics have scarcely changed making a similar diet ideal for modern human health and well-being.

Unfortunately, I found this recipe to be lacking in flavor, even the tahini dressing did not help that much. So . . . the version below is my adaptation adding in a few more herbs, spices, and (most importantly) a few more pinches of salt.

Dukkah Carrot & Zucchini Bites with Tahini Dressing

adapted from: Lady Homemade

INGREDIENTS

  • 2 small zucchini (courgette), grated – should be about 2 1/2 cups
  • 2 small carrots, grated – should be about 2 1/2 cups
  • 2 eggs
  • 1 1/2 cups blanched almond meal
  • 2 cloves garlic, crushed
  • pinch of dried chilli flakes or more if you dare
  • pinch of smoked paprika
  • 1 tablespoon fresh chives
  • 2 teaspoons dill
  • 2 teaspoons salt
  • 1 teaspoon pepper
  • 3-4 tablespoon dukkah spice mix, store bought or make your own

for the dipping sauce

  • 2 tablespoons tahini
  • 1 lemon, juice and zest
  • 3-4 tablespoons hot water
  • 1/2 teaspoon salt
  • 1 teaspoon smoked paprika

Heat oven to 180 degrees C.

Grate zucchinis, mix in a good couple of pinches of salt and leave to sit in a colander for at least 30 minutes.

Grate carrots and add to a mixing bowl with the almond meal, garlic, spices (except the dukkah).

One handful at a time, squeeze the grated zucchini to get out as much of the water as possible then add to the carrots.

Add the eggs and mix until thoroughly combined

Shape into little balls and place on a lined oven tray. Once you have made all the balls, sprinkle generously with dukkah.

Bake for 25 to 30 minutes until golden brown. They might give off a little liquid when cooking, this is normal.

To make the dipping sauce, mix tahini and lemon juice in a bowl until combined. Then add tablespoons of warm water
until the desired consistency. Add spices and mix until all ingredients are combined.

ENJOY!!

Advertisement
Standard
100 Days Project, Soups

Day 16 – Vegetarian French Onion Soup

Day16

Thank you for your patience Herbivores . . .

I was away up North Saturday night at a friend’s bach (hoilday house), for a quick little get away. I came back on Sunday, but ended up having to take a friend to the hospital and spent most of the night in the A&E. I promise normal posting will returning this week.

Even though I have not been posting I have still been cooking for my 100 Days Project, and going away with friends is the perfect opportunity to cook up a big group meal and try out some new recipes on the unsuspecting eaters.

French Onion Soup is winter classic, but it gains much of it’s traditional flavor from the use of beef stock making the soup not very vegetarian friendly.  I have always been curious about what this soup tastes like, especially since it is normally served in a bowl topped with gooey cheese melted across a bread layer. Anything with melted cheese on it usually gets my attention. So . . . when I came across this recipe from the amazing Jerry James Stone that promised to deliver on the flavor by using coffee to help give the soup a hearty earthy flavor vegetarian versions are normally missing, I have to admit I was intrigued.

Needless to say my meat eating friends were dubious when I told them I was making a soup with coffee in it, but all in all this version of French Onion Soup got the meat eaters thumbs up seal of approval.

French Onion Soup

adapted from: Jerry James Stone

INGREDIENTS

  • 4 large red onions, thinly sliced
  • 8 cups mushroom stock (1 teaspoon of stock powder per cup of water)
  • 1 cup strong brewed coffee
  • 1/4 cup dry white wine
  • 1 teaspoon fresh thyme
  • 1 teaspoon of sugar
  • Olive oil
  • Bread slices (I used a whole wheat sourdough)
  • Sliced cheese (Emmentaler or Swiss)
  • Salt and pepper to taste

In a large stock pot, add the thinly sliced onions and some olive oil. You want just enough olive oil to lightly coat them.

Turn the heat to medium-high and cook the onions down, caramelizing them. Only stir them every five minutes. If they begin to burn instead of caramelizing, reduce the heat a bit. Caramelizing onions is really a balancing act between your burner and the quality of your stock pot.

Once the onions have been reduced, add the mushroom stock.

Add the thyme, white wine and sugar. Bring the mixture to a very low simmer and cook covered for about three hours, stirring occasionally.

While that simmers, brew a single cup of your favorite coffee. Add the cup of coffee to the soup in small batches, stir well and taste. You don’t want your soup to taste like coffee, you just want to enhance the flavor. Depending on how strong you brew yours, you might not use a full cup. Then salt and pepper the soup to taste.

For each serving, fill a ramekin or small bowl with a heaping amount of soup and place it in the large baking dish. You’ll need one bread slice for every serving, and place the bread on top of each filled ramekin or small bowl. Top with a slice of cheese or two (you can never have enough melted cheese).

Place the baking dish under the broiler for a few minutes just until cheese is melty and starting to brown.

ENJOY!!

Standard
100 Days Project, Dairy Free, Gluten Free, Recipes, Side Dish, Vegan

Day 15 – Horseradish Potato Salad

Day15

Summer or Winter, it is always a good time to make potato salad.

It makes the perfect accompaniment for the summertime BBQs, and a hearty side dish for meals on those cold winter nights. Usually potato salad is made with cream, sour cream or mayonnaise, so I was really excited to find this vegan version that can be made for everyone to enjoy. This recipe from Karina: The Gluten Free Goddess uses olive oil and apple cider vinegar in place of the mayonnaise dressing.

Horseradish, which is a spicy root vegetable closely related to mustard, wasabi, broccoli, and cabbage, is the main flavor element of this recipe.  I surprisingly found this ingredient (either fresh or prepared) vary hard to find in New Zealand. If you can only find it fresh make sure to process it into a paste in a food processor adding a slight bit of water and white vinegar, or else it will go brown. I finally found a prepared version at Farro Fresh, a high-end Auckland based food market. If you live outside of Auckland, you should be able to find it at a similar type of store. Make sure not to get a prepared version that has dairy mixed in, it should only have water , salt, or vinegar.

Usually, I like to add pickles to my potato salad, but that did not quite seem to be the right thing to go with the flavors in this recipe. So I had a quick look in the fridge and came up with the perfect solution, Capers!!! These added the perfect little pop of salty goodness.

This potato salad recipe turned out so full of flavor, and made a perfect side dish to go with the left over Lentil and Chickpea Sliders from my Day 14 post.

Horseradish Potato Salad

adapted from: The Gluten Free Goddess

INGREDIENTS:

  • 2 pounds or 1 kg small red potatoes
  • Sea salt
  • 1/4 cup fruity tasting extra virgin olive oil, as needed
  • 5 tablespoons apple cider
  • 1 smallish red onion, finely diced
  • 2 tablespoons prepared horseradish
  • Sea salt and fresh ground black pepper
  • 2 tablespoons chopped fresh parsley
  • 2 teaspoons dill, to taste
  • 1 teaspoon caraway seeds
  • 2 tablespoons capers

Wash and cut up the red potatoes, toss them into a pot of salted fresh water. Bring the water to a boil and simmer the potatoes until they are fork tender. Drain well.

Pour the cooked potatoes into a large bowl. While the potatoes are still warm, sprinkle with sea salt and drizzle with extra virgin olive oil and vinegar. Toss to coat and to soften the edges of the potatoes pieces a bit. Add the diced onion, horseradish and toss to distribute. Taste and season with more sea salt and fresh ground pepper. Add the chopped parsley, dill, caraway, and capers; mix. Taste test, and add more olive oil or vinegar, sea salt or herbs, if needed.

Serve warm, or cover and chill.

ENJOY!!

Standard
100 Days Project, Desert, Gluten Free, Recipes, Vegan (with substitutions)

Day 3 – When All Else Fails . . . Make Snickers Truffles

Photo1(17)

So . . . do you remember from my Day 2 post that I had a lot trouble getting the Snickers Bars out of my glass baking dish?

This left me with a rather large amount of broken bits, pieces, chunks that were falling part, and gooey caramel.  Probably close to half the dish wound up being unusable. I hate wasting food; I REALLY hate wasting food . . . especially something that I had put so much time and effort into making. Now those of you that know me, know I am a bit of an insomniac especially when I have something on my mind. I lay awake last night thinking about what, if anything, I could do with this rather yummy mess, and then it came to me  . . . TRUFFLES!!

Day3_3I am not talking about the mushroom kind; I am talking about the yummy, soft, chocolatey little round balls of goodness. I have never made any sort of truffle before, but figured it was worth trying to turn this chocolate, caramel, peanut, nougat mess into some sort of Snickers Truffles. Using my food processor attachment of my stick blender I pulsed the mixture until the larger bits looked broken down but still chunky (I did not want to completely blend it all together as I hoped the different textures of the original Snickers bar layers would still come through). I wet my hands slightly with cold water and rolled a small ping pong ball sized portion of the mixture into as round a shape as I could make it. The caramel was sticky enough that it held everything together, but in the current state they did not look too appetising. There will still some roasted, salted peanuts left from making the Snickers bars the day before. So I quickly pulsed those in the blender into a coarse grind, and then rolled the caramel ball in the peanuts to give it a textured, more appealing finish. VIOLA!!! . . . the Snickers Truffle was born!!

This just goes to show, that when things do not go quite according to plan in the kitchen, do not get upset or feel like you have failed . . . GET CREATIVE!!

I realize this is not officially a new recipe, because the recipe for these truffles would be the same as the for the Snickers Bars, but it is making something I have never made before, so I think it still counts.

Now all that is left to do is to see which people like more . . . the Snickers Bar or the Snickers Truffle.

ENJOY!!

Standard
100 Days Project, Desert, Gluten Free, Recipes, Vegan (with substitutions)

Day 2 – Make Your Own Snickers Bars

day2 v2

Well we are onto Day 2 of the 100 Days Project and I decided that since last night recipes were all savory, we needed desert!!

Now I adore Snickers bars!!  I honestly do not think I would have gotten through University without them. Running between classrooms, labs, and my on campus jobs, Snickers were my first choice from the vending machines from which I all too often ate my meals.  I think I rationalised that because they had peanuts, they probably had the most protein and nutrients to keep me going through the day. Hmmm . . .

Imagine my delight at finding a recipe online, from How Sweet It Is, for making your own version of a Snickers bar . . . and it was definitely one of the recipes on the top of my list for attempting during the 100 Days Project challenge.

I figured it was not going to be easy, but was somewhat dismayed when going over the ingredients list to find multiple items that are not readily available in New Zealand: Marshmallow Fluff and pre-packaged creme caramels. Now if you are willing to go for a 20min drive and pay inflated prices, you can probably get these items as well as many other American food goodies from Martha’s Backyard, the American store in the Auckland suburb of Mt. Wellington (Yes, some of you Yanks might find this hard to believe, but there actually is such a thing as an American store).  I have to admit there have been times I have been craving some particular thing (usually Cool Ranch Doritos) that I make the trek out there and would be willing to pay whatever they are charging for that item, but the main sticking point this time is commercially made Marshmallow Fluff, like most marshmallows, is not vegetarian since it has gelatine. In keeping with the DIY tradition of my adopted Kiwi home, I figured why not try to make both the marshmallow and the caramel myself. It would take quite a bit more effort and time, but what else is a Saturday afternoon for, than attempting to make a delicious treat.

Marshmallow Fluff, made from the Angel food Vegan Marshmallow Mix

Marshmallow Fluff, made from the Angel food Vegan Marshmallow Mix

Marshmallow is something I have not had in close to 20 years and I remember them being quite yummy, which is why luckily I recently picked up a packet of Angel Food Vegan Marshmallow Mix from the SAFE shop in St. Kevin’s Arcade figuring I would find something to do with it. It turns out that Snickers bars was that something. Now I do not normally make things from packets, but vegan marshmallow is something I realistically have no idea how to even start making.  Inside the packet were two sachets clearly marked A and B and easy to follow step by step directions. The biggest obstacle is that you need a candy thermometer to know when the sugar syrup has gotten up to temperature, but I was able to borrow one from a friend who lives close by. The marshmallow fluff created by this packet tasted exactly like I remember marshmallows are supposed to taste. It brought back memories of peanut butter and fluff sandwiches or just digging in with a spoon for a quick after school sugar fix. Fluff was not something my parents allowed around the house often, but it was always a treat. There was more than enough to use for this recipe and have some leftover to form into traditional marshmallow shapes for munching and potential use in another recipe later next week; are you intrigued?

caramel

My very large pan full of caramel

As for the creme caramels, I had always seen contestants on Masterchef making their own caramel so I figured it could not be that hard, right? I did a bit of a Google search and came across this page by pastry chef David Lebovitz, which seemed to outline the process of making a dry caramel quite clearly. I followed the steps and succeeded in making a lovely brown caramel. Now the recipe says to melt the store bought creme caramels and add 1/4 cup of heavy whipping cream, which David Lebovitz’s blog also talks about using cream to “stop” the caramel, which means stop it from fully hardening. So I added my 1/4 cup of cream, mixed it through, and set the pan aside while working on another task for the recipe. YIKES!! When I came back to the pan, I saw that the caramel had completely hardened in the pan into a rock solid, smooth as glass sheet. Only too late did I realize that the store bought creme caramels would already have cream mixed through them, and the additional 1/4 cup was only to smooth out the texture further. I spent the next hour or so, gently reheating (you do not want to do this too quickly as the caramel can easily burn) the caramel mixture so that I could add more cream and achieve the correct consistency. In the end I wound up with a very large amount of lovely, incredibly rich caramel  . . . Phew!! If anyone needs caramel for anything, just let me know; I have PLENTY left over.

Make Your Own Snickers Bars

INGREDIENTS:

bottom chocolate layer

  • 1 1/4 cups milk chocolate chips (I used dark chocolate out of personal preference)
  • 1/4 cup peanut butter

Thoroughly grease your baking pan or put down a layer of wax paper. Melt ingredients together in a saucepan, double boiler or microwave, then pour into the baking dish and spread until even. Let cool and harden completely.

nougat layer

  • 1/4 cup unsalted butter
  • 1 cup granulated sugar
  • 1/4 cup evaporated milk
  • 1 1/2 cups vegetarian/vegan marshmallow fluff
  • 1 1/2 cup salted peanuts chopped, roughly chopped
  • 1 tsp vanilla extract

Melt butter in a saucepan over medium heat. Add in sugar and milk, stirring until dissolved and bring to a boil. Let cook for 5 minutes, stirring occasionally. Add in fluff, and vanilla, stirring until smooth. Turn off heat and fold in peanuts, then pour over bottom chocolate layer. Let cool completely. I wanting to make this recipe Vegan, you can substitute the butter for a non-dairy alternative like Olivani, and you can buy a soy evaporated milk and the Angel Food Vegan Marshmallow Mix from the SAFE store in st Kevin’s arcade.

caramel layer

  • 1 cup sugar
  • 250 g heavy cream

Follow the technique for making a dry caramel found on David Lebovitz’s page. Once your caramel mixture is glossy turn down the heat and stir in the heavy cream to “stop” the caramel. This may bubble a little but that is OK, keep on stirring until the heavy cream is well combined and the caramel is smooth. Keep a glass of ice water nearby and drop a small amount on caramel into the water to see if it will completely harden or keep its gooey texture. If hardens too much, add more cream, if does not harden enough, add more sugar. Pour over nougat layer and let cool completely. For a Vegan alternative you can buy soy caramel from the SAFE Store in St. Kevins arcade.

top chocolate layer

  • 1 1/4 cups milk chocolate chips (I used dark chocolate out of personal preference)
  • 1/4 cup peanut butter

Melt ingredients together in a saucepan or microwave, then pour over caramel and spread until even. Let cool and harden completely. Refrigerate for at least one hour before serving, then cut as desired. These can stay at room temperature, but they may get gooey.

While I can not say this is the most successful recipe I have ever made, I learned a lot about many different processes. I succeeded in making Vegan marshmallow (which I will definitely be doing again) and my own caramel. Both of which I have never done before . . . YAY!!  The above recipe is my version, which I hope clarifies the steps and means making this will be much easier for the next person, than it was for me.  My only further suggestions would be to make sure you do each step in the order they are listed, as trying to jump around and do multiple steps at once caused more problems then it saved time.

Also you may want to use either a tin foil disposable tray or silicone baking dish for this recipe, as I had a lot of trouble actually getting the finished Snickers bars out of my glass baking dish.  If you are going to use a glass dish line it with wax paper, which will help the finished product come out (I forgot to do this).

These come out incredibly rich . . . I would recommend cutting into small pieces, and serving with a cup of tea or warm milk.

 ENJOY!!

Standard
Dairy Free, Gluten Free, Recipes, Side Dish, Vegan

Green Beans with Leek & Toasted Almonds

green beans

Hello Herbivores  . . . some people have been asking for the green beans recipe that was served along with the lentil sheppard’s pie in my Day 1 post. So, ask and you shall receive!!

This recipe originally came from Heidi Swanson of the 101 Cookbooks food blog. Her recipes are always simple, with minimal ingredients and packed full of flavor. I have to admit I have tweaked this recipe slightly myself (well then again, I tweak most recipes . . . that is half the fun of cooking).

INGREDIENTS

  • 2 large leeks, well washed, root end and tops trimmed, sliced lengthwise into quarters and then chopped into 15mm segments
  • 1/3 cup fresh dill, well chopped
  • 500g green beans, tops and tails trimmed and cut into 30mm segments
  • extra-virgin olive oil
  • fine-grain sea salt
  • slivered almonds

Toast the slivered Almonds in a dry skillet over a medium-high heat until they are nicely browned. Make sure you keep an eye on these as they can very quickly go from brown to burnt.

In a large thick-bottomed skillet of medium-high heat add a generous splash of olive oil, a generous pinch of salt and the leeks. Stir until the leeks are coated and glossy. Cook, stirring regularly until a lot of the leeks are golden and crispy. All in all it takes me roughly 7 – 10 minutes to brown the leeks.

At this point stir in the dill and almonds, and then stir in the green beans. Cook for a couple more minutes – just until the the beans brighten up and lose that raw
bite. Turn out into a bowl or onto a platter and serve immediately.

ENJOY!!

Standard
100 Days Project, Gluten Free, Mains, Recipes, Vegan (with substitutions)

Day 1 – Lentil Sheppard’s Pie with Goat Cheese Potato Top

Day1_new

Today was Day 1 of my 100 Days Project challenge and the first official Herbivore food entry . . . how exciting is this!?!

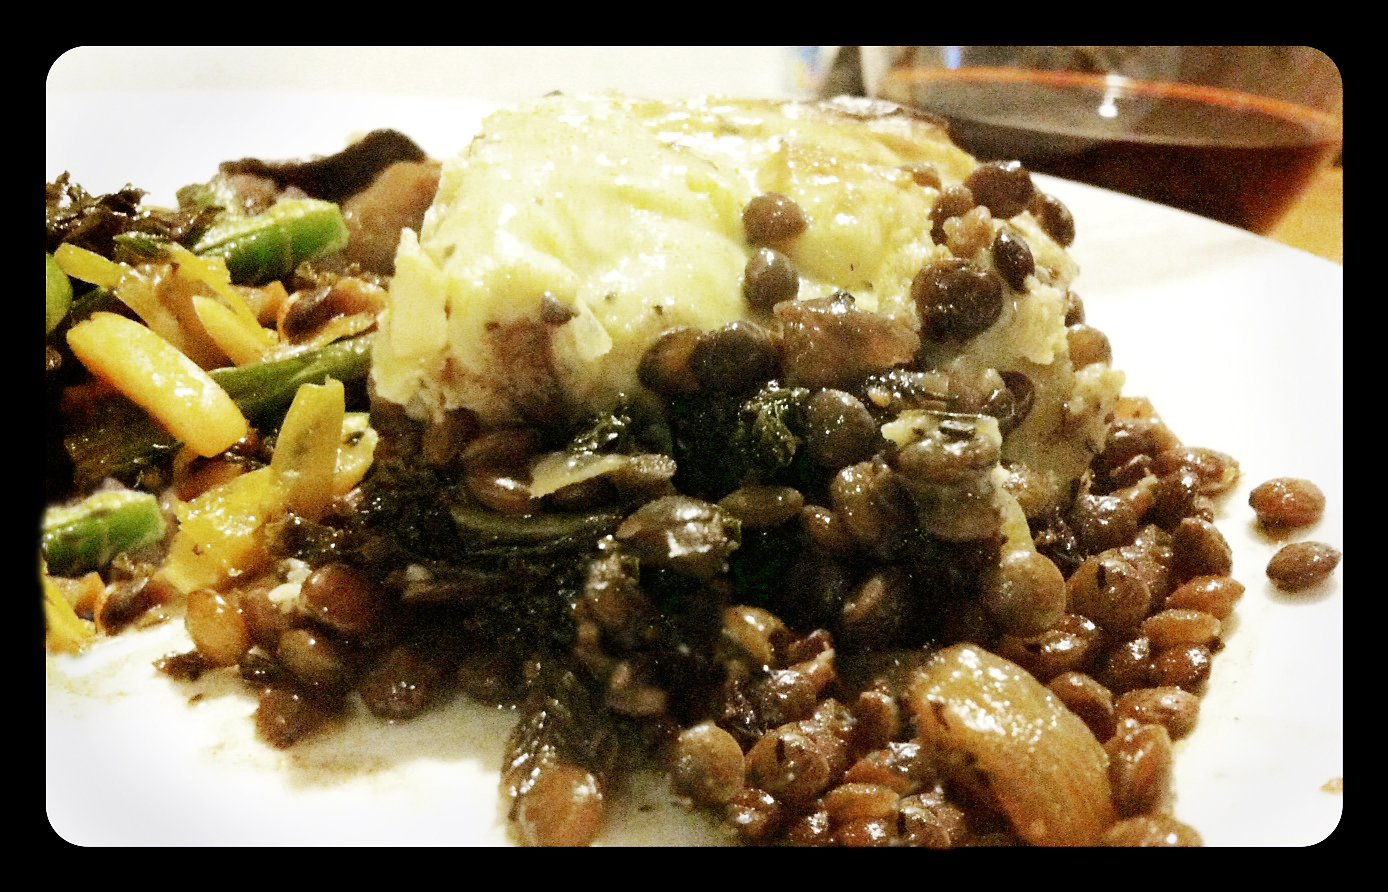
Every good adventure needs a good story at the beginning, so I decided to start things off with a bit of a celebration. I invited a few friends around for dinner, set aside a nice bottle of wine (Barossa Babe 2006 Shiraz), and dug into my trove of untested recipes to see what gems I could come up with.  This recipe for Lentil Sheppard’s Pie with Goat’s Cheese Potato Top is one from a vegetarian food blog called The Cozy Herbivore that has been floating around in my collection for awhile now. As it is winter here in New Zealand, I thought it would be the perfect thing to fill our bellies on a chilly night.

Being a Friday and therefore somewhat limited in after work cooking time, I knew I was going to have do my shopping ahead. Some of the ingredients, like kale, tend to be difficult to find in New Zealand so I went to my favorite produce shop Art of Produce, in Ponsonby. If you have never been to this place, it is a must!!! Mostly providing to the hospitality trade, the place is a warehouse with with 2 giant walk-in refrigerators, that are stocked with pallets, boxes, bags, and baskets of almost any fruit and vegetable you can imagine and a few other hard to find products. While sometimes this over abundance makes looking for a particular item a bit of a scavenger hunt, the staff seem to readily know where any given item is in the chaos and you only have to ask. Everything is really fresh, well priced, and even sourced locally when possible.

As this recipe calls for red wine, I also had to decide what wine to use. Many people believe that you should cook with cheap wine.  The problem with this option is that often cheap wine does not taste very nice and you are transferring that “not so nice” flavor to your cooking. I believe you should cook with a reasonably priced bottle that has a flavor appropriate to the recipe you are making. I tend to choose the slightly nicer bottle, that just happens to be on sale at the bottle shop or grocery store. For this recipe I used Brancott Estate Living Land Series 2011 Pinot Noir, which coincidentally is a wine label undergoing conversion to being fully Organic and so in line with Herbivore ideology. To be completely honest, this is not a wine that I personally enjoy drinking, as it is too light and fruity for my palette, but that fruitiness is ideal for adding that extra depth to the flavor of this dish.

I was excited all day about starting my challenge, but of course I did not get home from work until much later than expected. Which means I was in a bit of a hurry, as my friends were going to start arriving soon for dinner. One of things to take into consideration is that there are a lot of processes in this recipe, and although they are all easy, they may take longer than expected to prepare. If I was going to make this dish again, I probably would save it for a weekend or make it up the night before to just pop into the oven the next day.  It ended up taking me almost 3 hours to prepare and cook this dish, which means we were not eating dinner till close to 9:30pm. Luckily for me, my friends are more than happy to sit around drinking wine, chatting, and being entertained by watching me run around in the kitchen like a mini cyclone. Plus, I did have a bowl of fresh bread rolls that I had made before going to work in morning for them to munch on. You must feed the masses if you are going to keep them waiting.

Even though it took longer than expected to make, I would consider this recipe a great success because it was YUMMY!! The recipe makes a large baking dish of Sheppard’s Pie, and between the 4 of us we pretty much ate almost the whole entire thing. There were lots of happy eating noises being made, going back for seconds and thirds even though supposedly “could not eat another bite”, and picking around the edges that might as well be another serving. Along with the Sheppard’s Pie I served sauteed Green Beans with Leek and Toasted Almonds (which one friend thought was the best part of the meal), and what was left of the Simple Bread Rolls. I will be posting the recipes for both of these over the next few days.

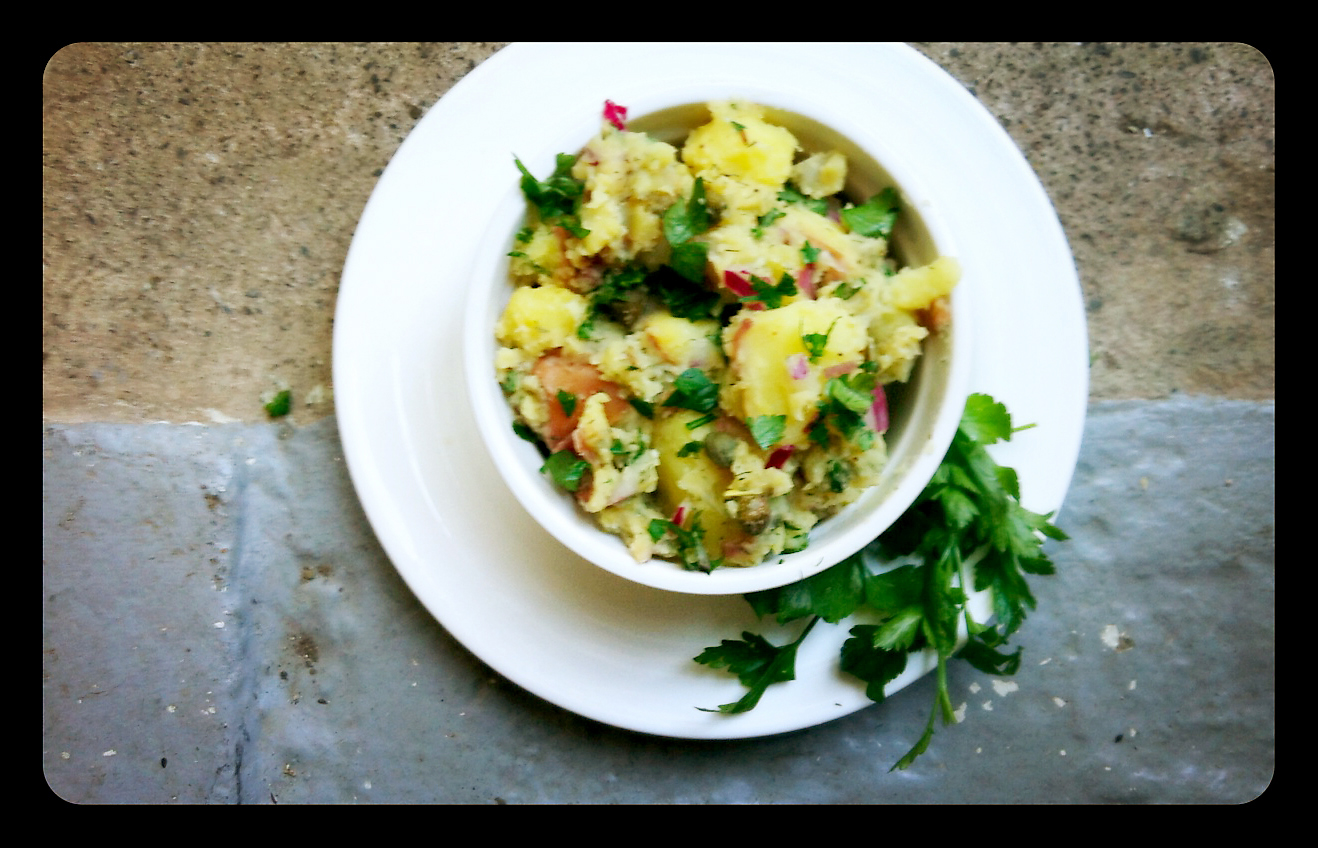
Another nice variation of this dish would be to make it as individual Sheppard’s pies in large ramekins.

This recipe is completely Gluten Free, and can easily be made Vegan by substituting out the goat cheese and buttermilk in the potato top.

Lentil Sheppard’s Pie with Goat Cheese Potato Top

by The Cozy Herbivore

PREP TIME: about 30 minutes
COOKING TIME: about 1 1/2 hours
MAKES: about 8 one cup servings

INGREDIENTS:

for the base:

  • 2 cups French green lentils (also called Puy lentils)
  • 1 cup red wine
  • 2 cups water (I used mushroom stock for a heartier flavor)
  • 2 tablespoons extra virgin olive oil, divided
  • 2 medium onions diced, about 2 cups)
  • 2-3 medium carrots, cut into 10mm quarter moons
  • 3 tablespoons fresh thyme leaves, removed from stems and finely chopped
  • 200 grams Crimini mushrooms, sliced (Crimini mushrooms are similar to white Button mushrooms, but they are a darker brown in colour and have more flavor as they have been left to mature longer; they are the middle growth stage between white Button mushrooms and Portobello mushrooms)
  • 3-4 leaves kale, stems removed, chopped into bite-sized pieces (you can substitute with silver beet, if you cannot find kale)
  • sea salt and freshly cracked pepper, to taste

for the top:

  • 1.5kg Yukon Gold or Russet potatoes, peeled and cut into chunks (neither of these potato types are available in New Zealand; I substituted with Agria potato, but you can use any floury potato)
  • 4 cups vegetable stock
  • 4 cups water
  • 1 head garlic
  • 125g herbed chevre or soft goat cheese, thinly sliced
  • 1/4 cup buttermilk, plus more as needed
  • sea salt and freshly cracked pepper, to taste

for the sauce:

  • 2 cups red wine
  • 1 teaspoon honey
  • pinch of sea salt
  • 2 teaspoons dried tarragon
  • 1 tablespoon cold unsalted butter

DIRECTIONS:

Preheat oven to 350 degrees Fahrenheit.Cut the top of the head of garlic off and wrap the whole thing loosely in aluminum foil. Place in the oven and roast until fragrant and very soft, about 45 minutes. When garlic is tender, allow to cool slightly and squeeze out roasted cloves, discarding papery skins. Set aside.

While the garlic is roasting . . . Spread lentils out on a sheet pan or clean counter and sift through them, discarding any stones or stems. Rinse lentils in cold water. Place lentils, 1 cup red wine and 2 cups water (or stock) in a large, heavy-bottomed stockpot. Bring mixture to a boil and immediately reduce heat to a simmer. Simmer until tender, about 30-40 minutes. When lentils are done, remove from heat, drain through a fine mesh, toss with a little olive oil, and set aside.

While lentils are simmering . . . place the chopped potatoes in another heavy-bottomed stockpot with 4 cups of vegetable stock and 4 cups of water. Bring mixture to a boil and immediately reduce heat to a simmer. Simmer until potatoes are extremely tender, almost falling apart.When potatoes are done, drain liquid and place potatoes back into stockpot with a loose lid to keep them warm and moist.

While the lentils and potatoes are bubbling on the stove and the garlic is roasting in the oven . . . heat up 1 tablespoon olive oil in a saute pan until the surface of the oil begins to shimmer. Add chopped onion and saute until soft and browned. Add carrot quarter moons and fresh thyme and saute for 5 minutes more, until carrots just begin to soften. Remove onions and carrots from pan and set aside . . .

Heat up another tablespoon of olive oil in saute pan. Add mushrooms and saute until mushrooms have lost their liquid and begin to brown, about 5 minutes. Add chopped kale and cooked onions and carrots to pan. Season with salt & pepper. Saute until kale turns bright green, about 2 minutes. Remove from heat, stir cooked lentils into vegetable mixture and set aside.

Prepare the mashed potato topping: pass cooked potatoes and roasted garlic through a potato ricer. (Alternately you can do this in a stand mixer or even with a hand-held potato masher for more rustic results, but a potato ricer will get you the fluffiest topping). Stir in goat cheese and buttermilk until a smooth consistency is reached. If you want to make this dish Vegan, you can leave out the goat cheese and substitute soy milk, rice milk, or olive oil for the buttermilk. Season to taste with salt and pepper.

Prepare the sauce: in a small saute pan, combine 2 cups red wine, 1 teaspoon honey and 2 teaspoons dried tarragon. Bring mixture to a boil and reduce by almost half, stirring occasionally to prevent sticking. When mixture looks thick (but not too syrup-y: be careful not to over-reduce!), reduce heat and half-remove the pan from the burner. Place the cold butter in the pan and continually swirl the pan until butter is melted. When butter is melted, turn off burner. To make this recipe Vegan, substitute the butter with Olivani or other non-dairy butter alternative.

Grease a large casserole dish. Place lentil and vegetable mixture on the bottom and spread evenly through the dish. Pour red wine sauce over lentils and vegetables. Place mashed potatoes in a piping bag with a large star tip and make whatever design you like on the top of the pie. Or you can simply spread the potato mixture over the lentils with a spatula and use a fork to make a cross-hatch design.

Bake for 20-25 minutes, or until mixture is heated through. Place casserole under broiler for 5 minutes (definitely keep an eye on it, though– those things can take your food from brown to burned fast) or until top is crisped and browned.

ENJOY!!

Standard